

Overview
Awaio has three separate mechanisms for letting more than one person use a locker. They solve different problems and are configured in different places, so it's worth being clear on which one fits your case before setting anything up:
- Team Access — a team has constant, always-on access to one or more lockers, via an Access group. No booking involved: any member can open the locker whenever they need to.
- Bookable by team — a locker is shared as a bookable resource. Team members reserve it, use it, and release it, the same way they'd book a desk or room.
- Access linked to a booking rule — booking a different resource (a room, a garage spot, a pool car) automatically grants access to a locker or door, typically for key pickup. This isn't team-specific — it applies to whoever makes the booking.
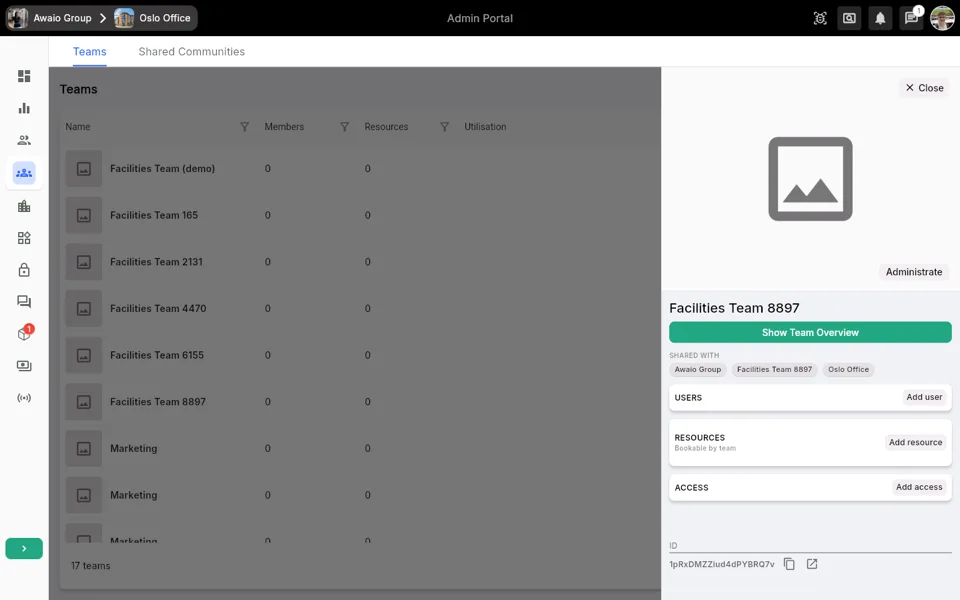
The first two are configured from a team's details panel, in two separate sections — Access and Resources. If you haven't created a team yet, see Create and manage teams first.
Before you begin
- You need admin access with the Teams role in your Awaio Admin Portal.
- The locker(s) must already exist as resources in Awaio.
- For Team Access or Bookable by team, the team must already exist. See Create and manage teams if you need to create one first.
- A locker can only be under an Access group or have a booking rule at a time, not both. A locker that already has a booking rule cannot be added to an Access group, and a locker inside an Access group cannot be given a booking rule, until the existing one is removed. Decide per locker which model fits before setting it up.
Method 1: Team Access — constant access via an Access group
Use this when a team should always be able to open specific lockers, with no booking step — for example, a shared supply cabinet that any team member can open at any time.
- First, create (or reuse) an Access group containing the locker(s) you want the team to have constant access to. This is done from Locks → Access in the Admin Portal — see Setting up access to doors, gates, and lockers for the steps, using the Storage category filter to find lockers.
- Open the team's details panel and locate the Access section.
- Click Add access. The Select Access dialog opens, listing existing Access groups — select the one you created in step 1.
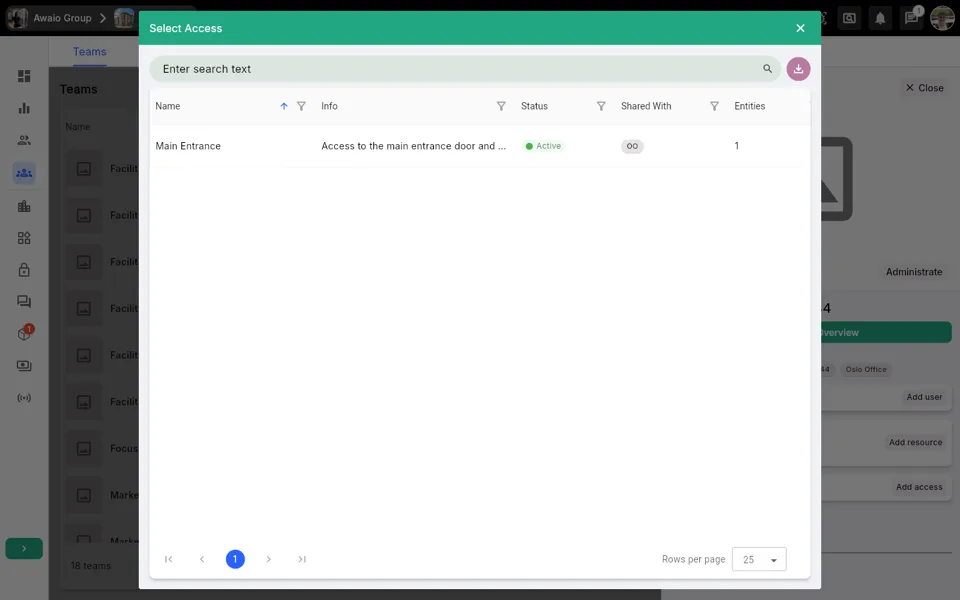
- The Access group now appears under Access in the team's details panel. Every current and future member of the team has constant access to the lockers in that group, immediately.
To revoke access, open the team details panel, find the Access group under Access, click the menu (⋮) next to it, and select Remove — or inactivate the Access group entirely from Locks → Access, which revokes it for every team and community it's shared with at once.
Method 2: Bookable by team — shared, reservation-based access
Use this when a locker should be shared but used one person (or one booking) at a time — for example, a rotating pool of storage lockers for a department.
- Open the team's details panel and scroll to the Resources section, subtitled Bookable by team.
- Click Add resource. The Add Resources to Team dialog opens, showing all available resources.
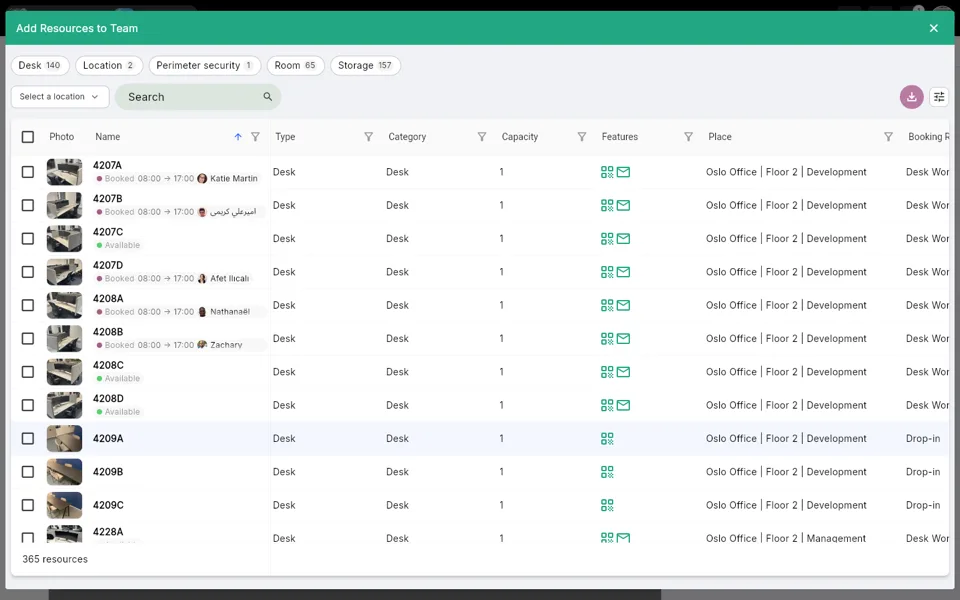
- Use the category filter pills at the top of the dialog (Storage, which lockers are categorised under) to narrow the list, or use the Search field if you know the locker's name.
- Select the checkbox next to each locker you want to add, then confirm the selection.
- The chosen lockers appear under Resources in the team's details panel. Team members can now book them; anyone who joins the team later can book them too, and anyone who leaves loses booking access automatically.
To remove a locker from the team, open the team details panel, locate it under Resources, click the menu (⋮) next to it, and select Remove.
Method 3: Access linked to a booking rule — key pickup on booking
This is a different pattern from the first two: instead of granting a team access to a locker, you attach a locker's Access group to the booking rule of a completely different resource. Anyone who books that resource — regardless of team — is automatically granted access to the linked locker or door for their booking.
This is what powers use cases like:
- Book a room → get access to that room's door.
- Book a garage spot → get access to the garage gate.
- Book a focus room → get access to a locker to pick up its key.
- Book a pool car (even from Outlook) → get access to the locker holding the car key.
To set it up:
- Create an Access group containing the locker or door that should be unlocked (as in Method 1, via Locks → Access).
- Open the booking rule for the resource that triggers access — the room, garage spot, or car — from the Booking Rules section of the Admin Portal.
- In the Access section of the booking rule's edit form, click Add and select the Access group from step 1.
- Save the booking rule. Anyone who books the governed resource now automatically gets access to the linked locker or door for their booking.
A booking rule can have more than one Access group attached, and the same Access group can be reused across multiple booking rules — for example, sharing one key locker between several bookable focus rooms.
Note: The Access section only appears on a booking rule if the Booking Confirmation feature is enabled for your community. If you don't see it and want to use this, contact Awaio support.
How the three combine
A single locker is always either under an Access group or has a booking rule — never both at once — but a workspace typically uses all three mechanisms side by side, on different lockers, for different purposes:
- Some lockers are Team Access — always open to a specific team (shared tools or supplies).
- Some lockers are Bookable by team — shared but reserved one at a time (personal storage rotations).
- Some lockers exist purely to be unlocked by someone else's booking — a key locker tied to a room, garage spot, or car's booking rule, usable by whoever made that booking.
A locker's visibility follows whichever mechanism it uses: a locker shared via Access is only usable by the teams or communities that Access group is shared with; a locker added to a team's Resources is only bookable by that team; a locker linked to a booking rule is accessible only to whoever holds a booking on the governed resource. This is how you keep one set of lockers visible only to Accounting and another only to Sales, or restrict a key locker to people who've actually booked the room it belongs to.
Automatically syncing team membership from Microsoft 365
If your organisation manages groups in Microsoft 365, you can connect a Microsoft 365 Group to an Awaio Team so group membership stays in sync automatically. Once connected, adding someone to the Microsoft group (for example, as part of onboarding a new hire) gives them locker access through the team — whether via Access or Resources — without any manual step in Awaio. See Connect Microsoft Groups to Awaio Teams for setup details.
Tips
- Bulk assignment — You can select multiple lockers in the Add Resources to Team dialog, or add multiple lockers to an Access group, in a single step — useful when equipping a whole department at once.
- No individual re-assignment needed — Because access is tied to team membership (Methods 1 and 2) or to the booking itself (Method 3), you don't need to update locker assignments when people join or leave a team, or make one-off bookings.
- Shared teams — If a team is shared with other communities (visible under Shared with in the team details), members of those communities gain the same access — both constant and bookable — that the team has. Confirm the sharing scope before adding resources or access groups.