

Overview
Access groups let you bundle one or more lock-controlled resources — doors, gates, barriers, and lockers — into a single named group, share that group with specific communities, and activate or deactivate it to instantly grant or revoke entry for all members. It's the same mechanism whether you're securing a door or a locker: what changes is only which resource category you pick when adding resources to the group. Access groups are managed from the Access tab within the Locks section of the Admin Portal.
Create a new access group
- In the Admin Portal, navigate to the Locks section and select the Access tab.
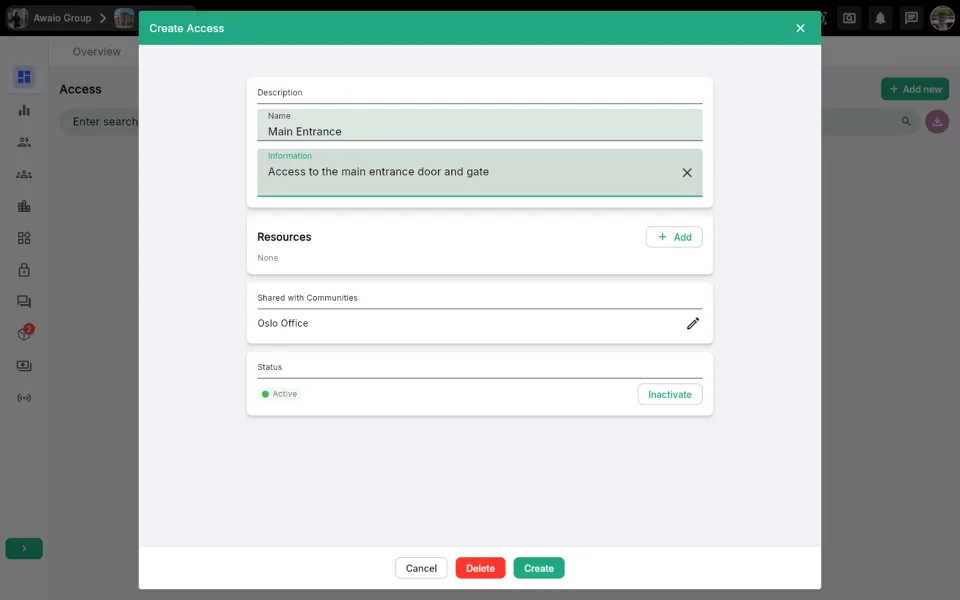
- Click + Add new in the top-right corner. The Create Access dialog opens.
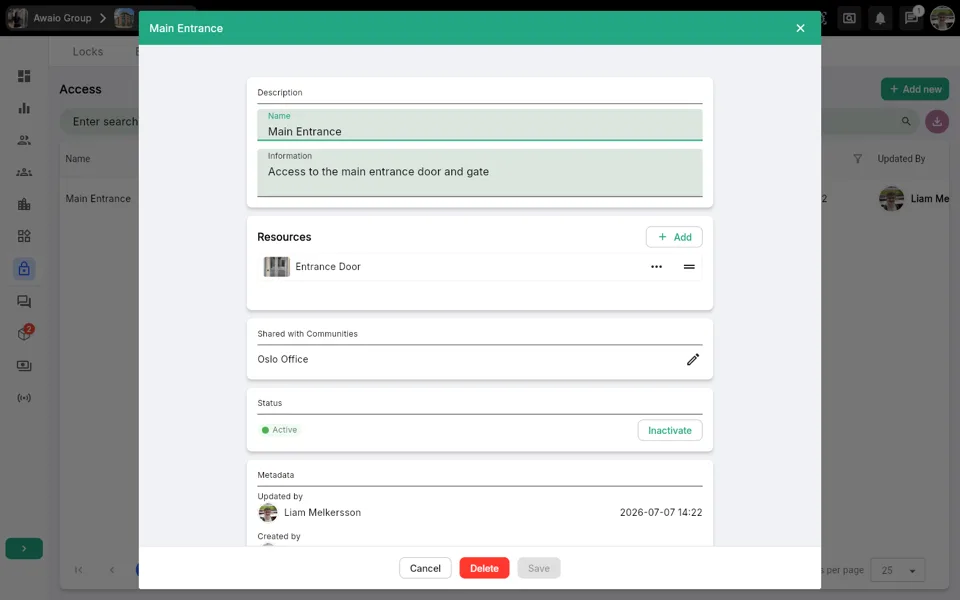
- Enter a Name for the access group (for example, Main Entrance).
- Optionally, enter a description in the Information field to help other admins identify the purpose of the group.
Add resources to the access group
Resources are the individual lock-controlled entities — a door, gate, or locker — that belong to the group.
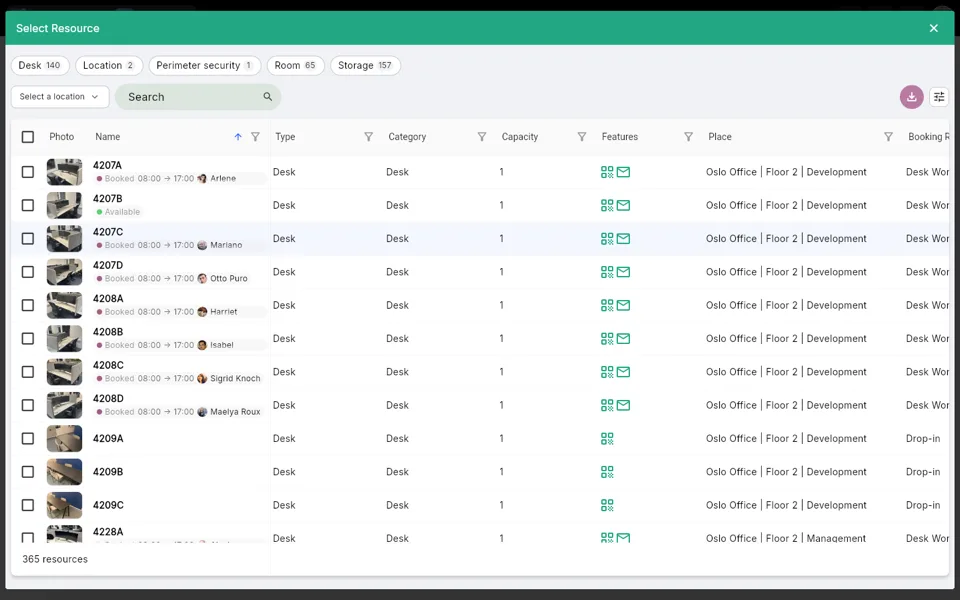
- In the Resources section, click + Add. The Select Resource dialog opens.
- Use the category filter pills (Perimeter security for doors and gates, Storage for lockers) or the search field to locate the resources you want to include.
- Select the checkbox next to each resource you want to add, then confirm your selection.
Note: Resources that already have a booking rule assigned cannot be added to an access group. Remove the booking rule from the resource first, then add it here.
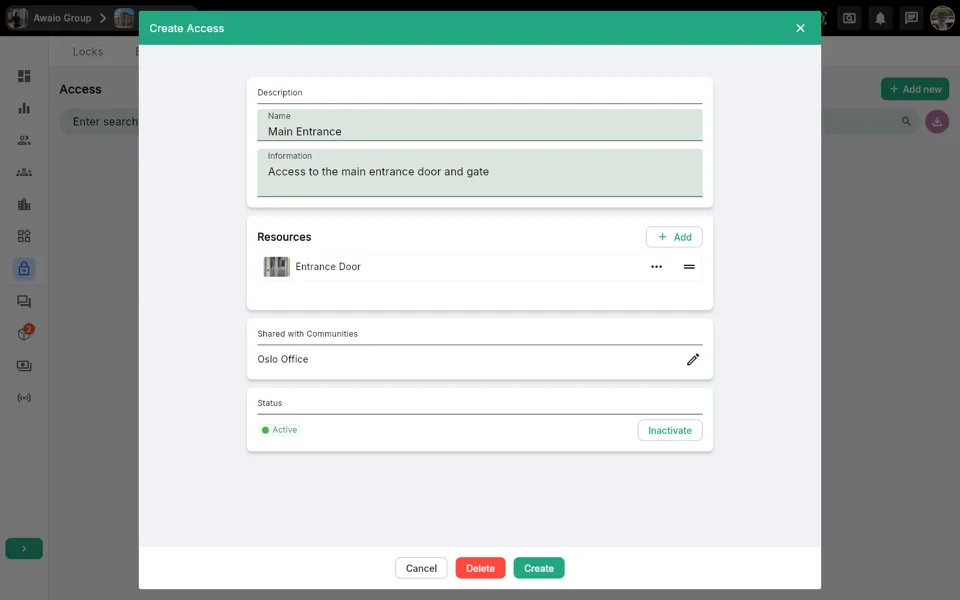
- The selected resource now appears in the Resources list inside the Create Access dialog.
Share the access group with communities
The Shared with Communities section controls which communities can use this access group.
- In the Create Access dialog, locate the Shared with Communities section.
- Click the pencil (edit) icon to open the sharing panel.
- Toggle on each community that should have access, then click Save.
The community names you selected will appear beneath the Shared with Communities heading.
Set the status and save
- Review the Status section. A newly created access group defaults to Active, meaning members of the shared communities can open the associated entry points immediately.
- If you want to create the group without granting access yet, click Inactivate before saving.
- Click Create to save the access group.
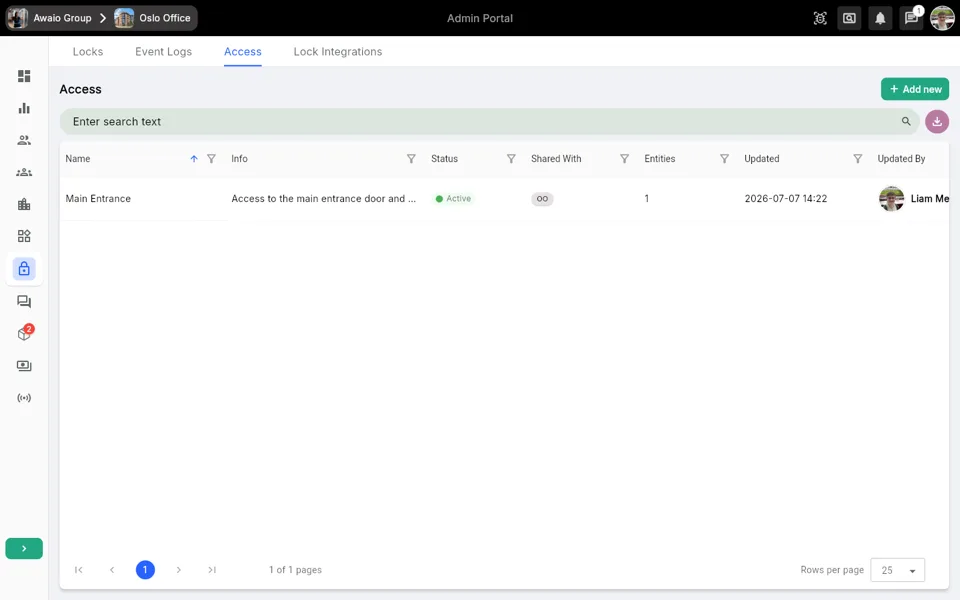
The new group appears in the Access list with its name, status, shared communities, and the number of entities it contains.
Edit an existing access group
- In the Access tab, click any row in the list to open the edit dialog.
- Update the Name, Information, Resources, or Shared with Communities as needed.
- To change the status, click Inactivate (when active) or Activate (when inactive) and confirm the prompt. Inactivating an access group immediately revokes entry for all users; activating it restores access.
- The Metadata section at the bottom shows who last updated the group and when, as well as who originally created it.
- Click Save to apply your changes, or Delete to permanently remove the access group.
Tips
- Use descriptive names and information fields. Names like Main Entrance or Parking Gate – Level B1 make it easier to identify groups at a glance and reduce misconfiguration.
- Reorder resources within a group by dragging the handle (≡) on each resource row.
- View access logs for a specific lock directly from the resource row inside the edit dialog by clicking Show log.
- Inactivate rather than delete when access needs to be temporarily suspended — the group and its configuration are preserved and can be reactivated at any time.
- Deleting an access group is irreversible and will revoke entry for all users currently relying on it. Awaio will automatically update any associated booking rules and resources before completing the deletion.