

Once your IT admin has deployed the Awaio Outlook add-in, you can book workplace resources directly from a meeting in Outlook — no need to open the Awaio app separately.
If you don't see it yet, you can add it yourself from the Outlook add-in store — see Adding the Awaio add-in in Outlook.
Add the Awaio button to your event window
The first time you use it, add the Awaio button to the event toolbar so it's one click away.
Step 1: Open Calendar in Outlook
Go to Calendar in Outlook.
Step 2: Click New Event
Click New Event to open the event window.
Step 3: Open the toolbar menu
In the event window, click the ⋯ (more options) menu in the top-right corner.
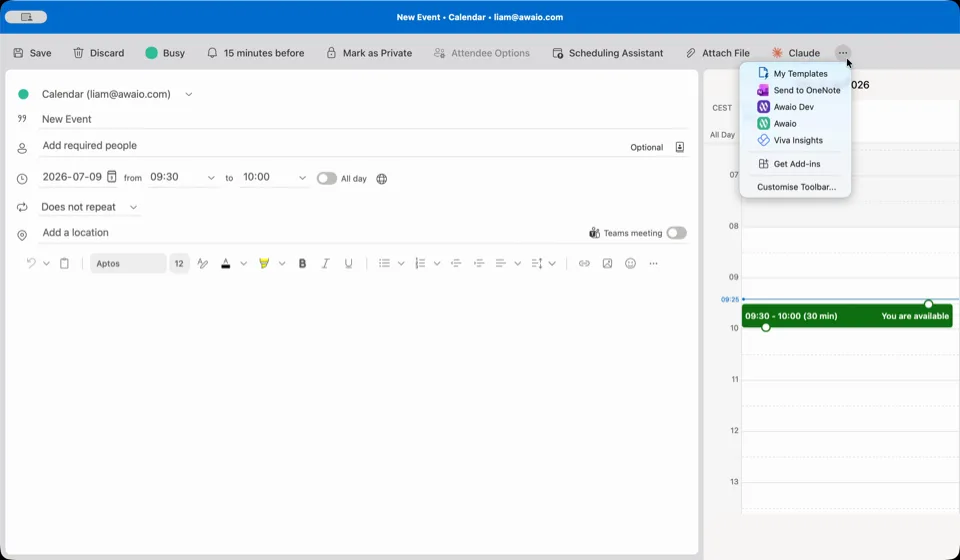
Step 4: Select Customize Toolbar
Choose Customize Toolbar from the menu.
Step 5: Drag Awaio onto the toolbar
Drag Awaio onto the toolbar and close the customization panel. The Awaio button now appears on every event window.
Book a resource from a meeting
Step 6: Open the Awaio add-in
With an event open, click the Awaio button on the toolbar. The Awaio task pane opens alongside the event.
Step 7: Find a resource
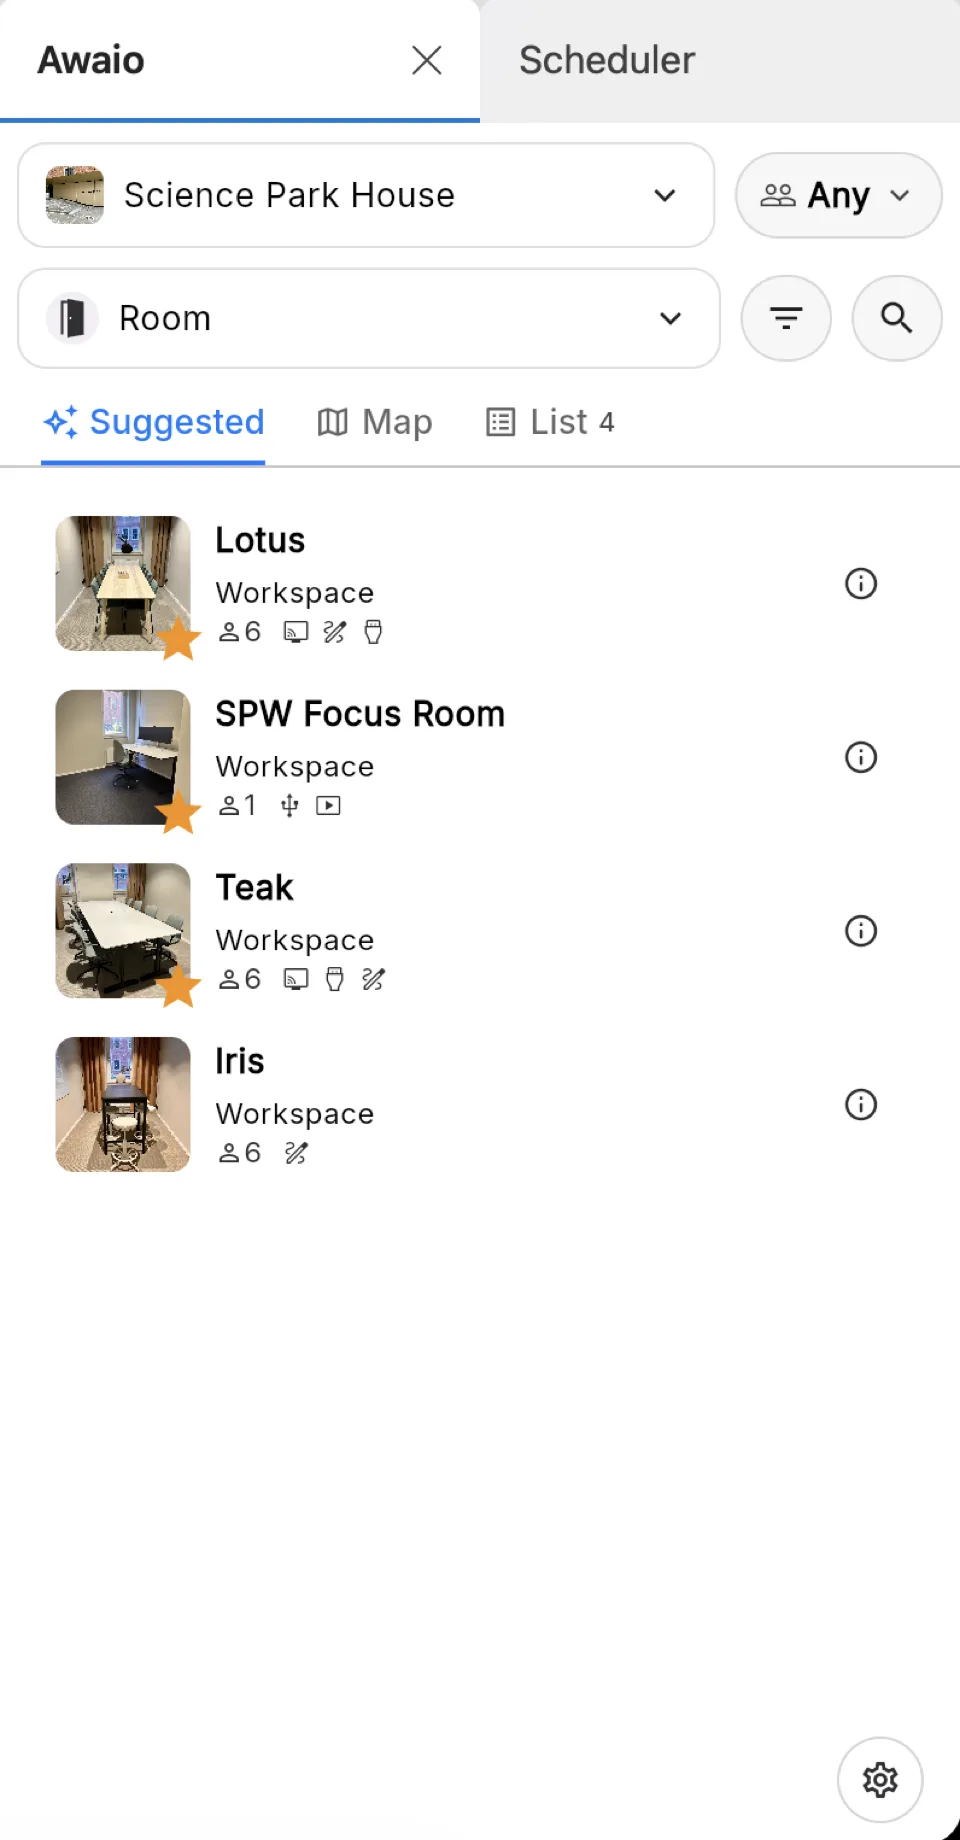
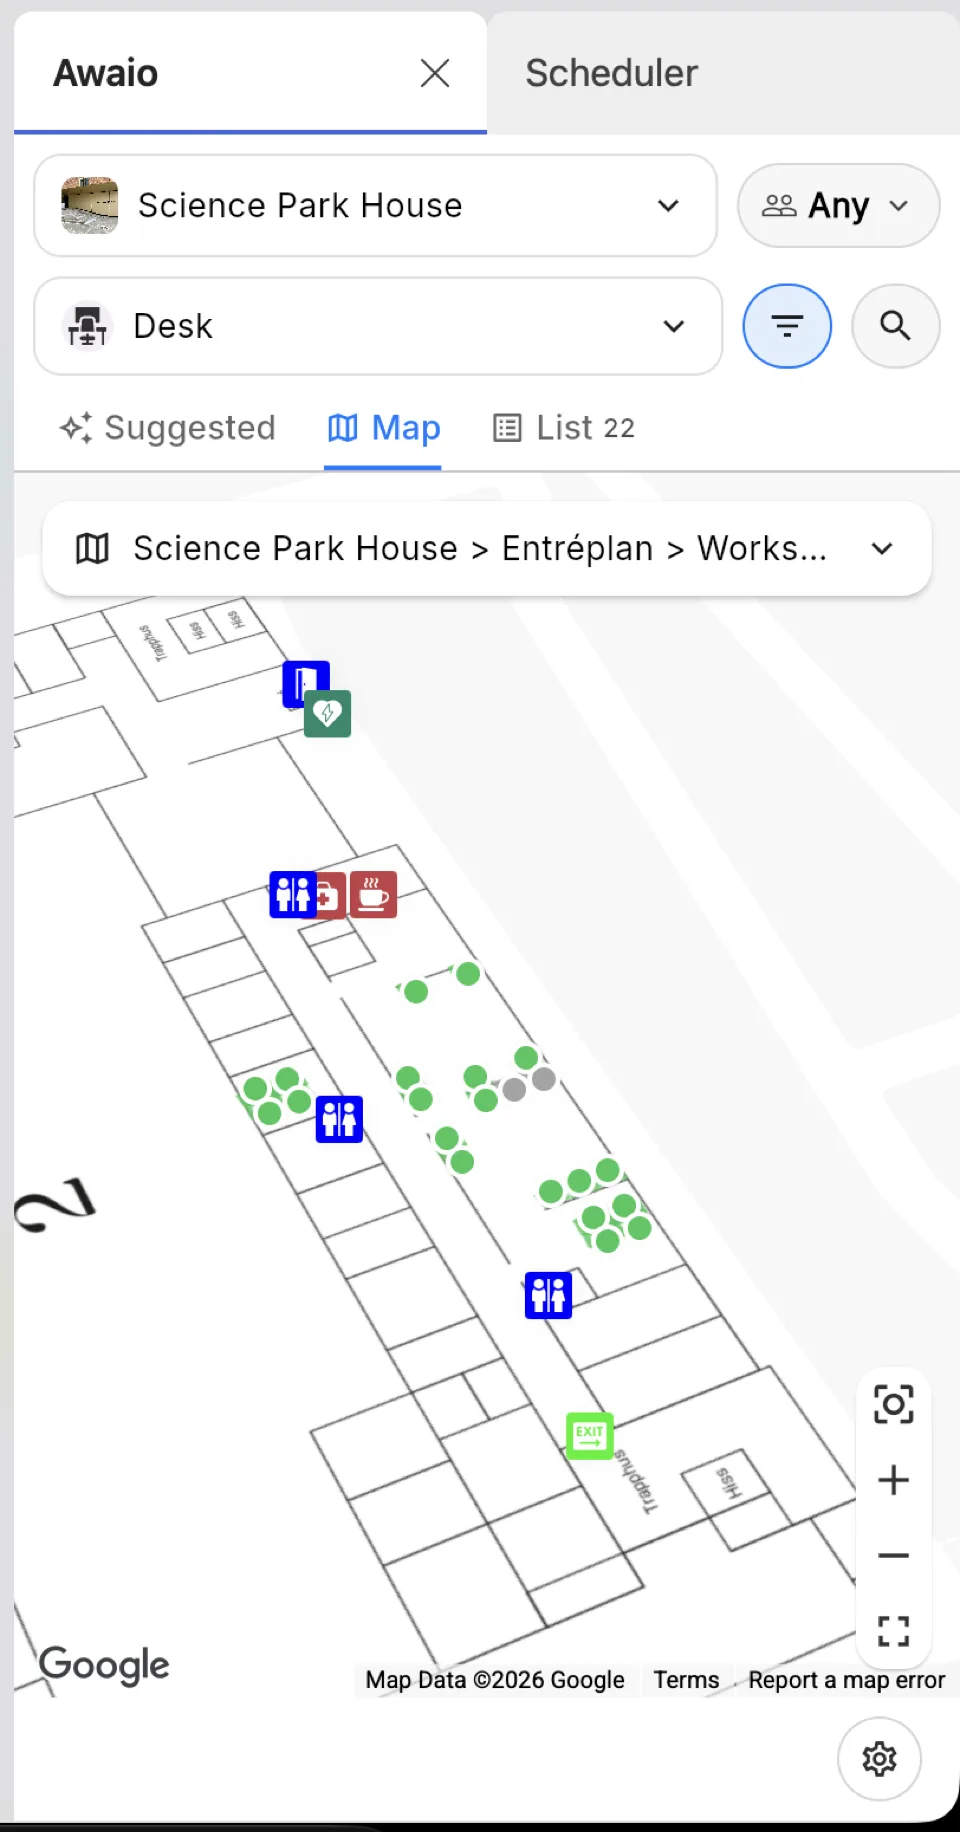
Pick a building and resource type (desk, room, parking, etc.), then find a resource one of two ways:
- Suggested / List: pick a resource from a suggested or filterable list.
- Map: browse the interactive office map by building, floor, and zone, and select a resource icon directly on the map.
Step 8: Check the resource details
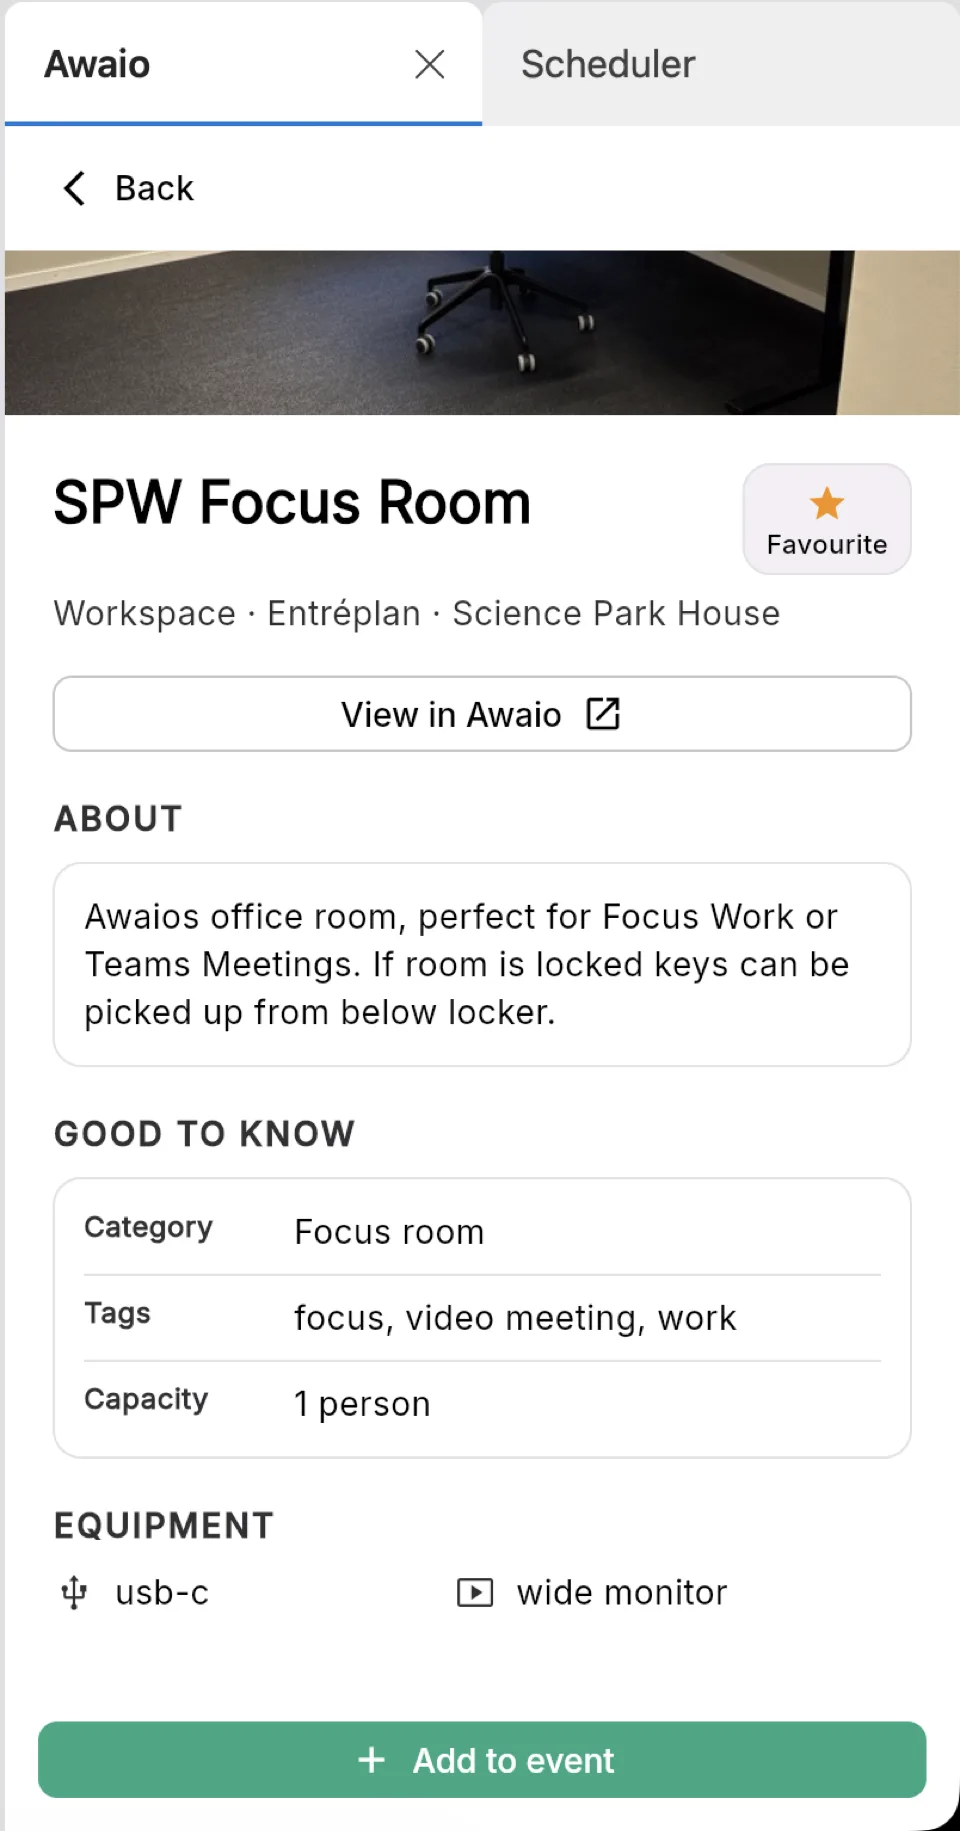
Tap a resource to open its detail page before booking. It shows a photo, location (building and floor), a description with anything you need to know (like where to find keys if the room is locked), category and tags, capacity, and the equipment available — USB-C, monitor, and so on. You can also mark it as a favourite for next time.
Step 9: Add attendees
Add the people you're meeting with as attendees on the event as normal. If you book a room through the add-in, invited attendees automatically get access to it — no separate booking needed on their end.
Step 10: Confirm the booking
Confirm your selection in the task pane, then save the event. The resource is now booked for the event's time slot.
Keeping bookings in sync
Bookings made through the Outlook add-in are the same bookings you see in the Awaio app. If you reschedule or update the event afterwards — in Outlook or in Awaio — the change is reflected on both sides.
If you have further questions, feel free to contact us via our website chat (awaio.com) or email us at support@awaio.com.