

Overview
Office Maps let employees see an interactive floor plan of your workplace and find bookable resources at a glance. This article walks you through creating a new office map, uploading a floor plan image, and placing your first resources on the map.
Before you start: You need the Places admin role to manage Office Maps.
Step 1: Open Office Maps and start a new map
- In the Admin Portal, navigate to Office Maps using the left-hand navigation.
- Review any existing maps listed in the table.
- Click + Add new in the top-right corner to open the Create Office Map dialog.
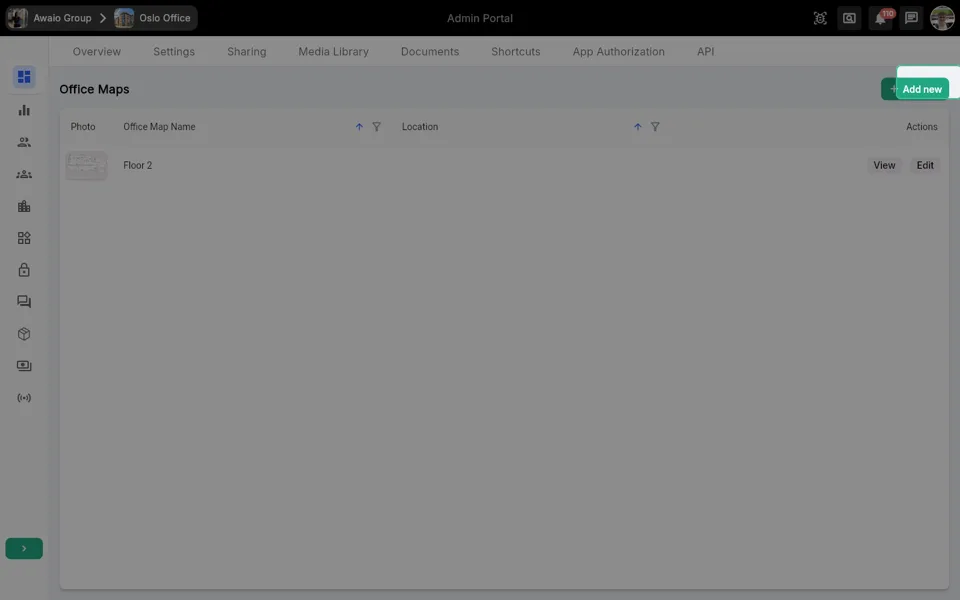
Step 2: Select a location for the map
- In the Create Office Map dialog, expand your community or building by clicking its name.
- Select the specific location (floor, zone, or space) you want to attach the map to. Only locations that do not already have an office map are selectable.
- A preview of the selected location appears at the bottom of the dialog.
- Click Create Office Map to create the map and open the editor. If the Create Office Map button is disabled, make sure you have selected a valid location.
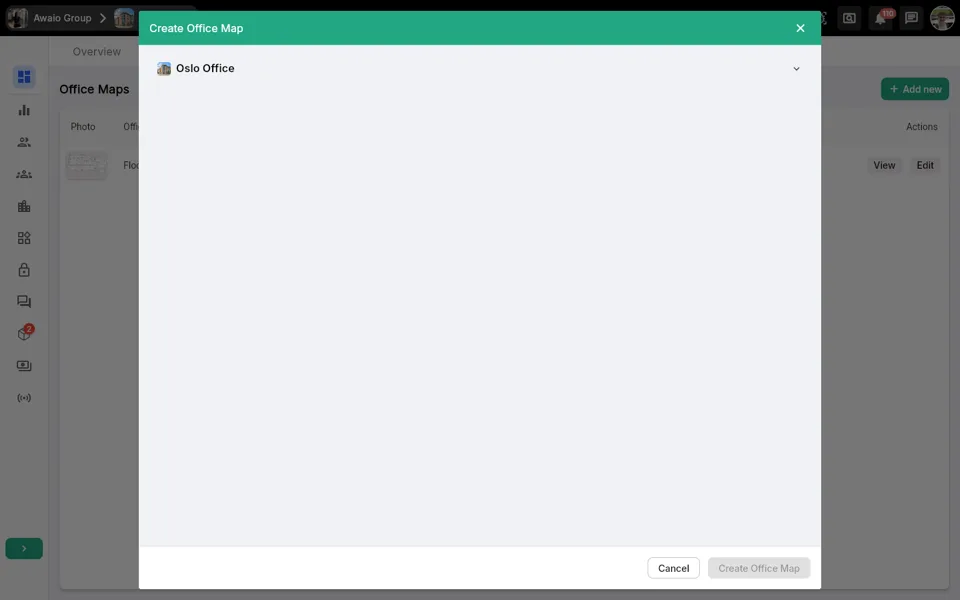
Note: Each location can have only one office map. Locations that already have a map are indicated with a map icon and cannot be selected.
Step 3: Explore the map editor
After the map is created, the editor opens automatically.
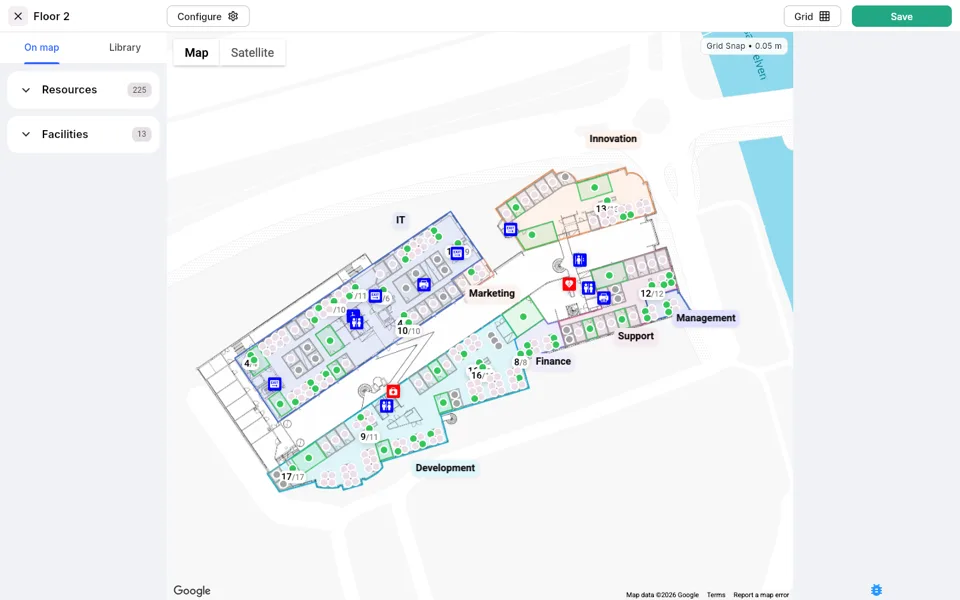
The editor is divided into three main areas:
| Area | Purpose |
|---|---|
| Left panel | Lists objects currently on the map (On map tab) or available to add (Library tab) |
| Map canvas | Interactive map where you position resources and facilities |
| Right panel | Appears when an object is selected; shows its properties |
The toolbar at the top provides access to Configure, Grid, and Save.
Step 4: Upload your floor plan image
- Click Configure in the top toolbar to open the Configure panel on the right.
- Under the Image section, click the image icon next to Add image (or Change image if one already exists).
- In the file picker, select your floor plan file. Supported formats are webp, png, jpg, jpeg, and avif.
- Once uploaded, the floor plan appears as an overlay on the map canvas.
- To reposition or resize the image, enable the Edit image toggle. Hold Ctrl while dragging to rotate the image.
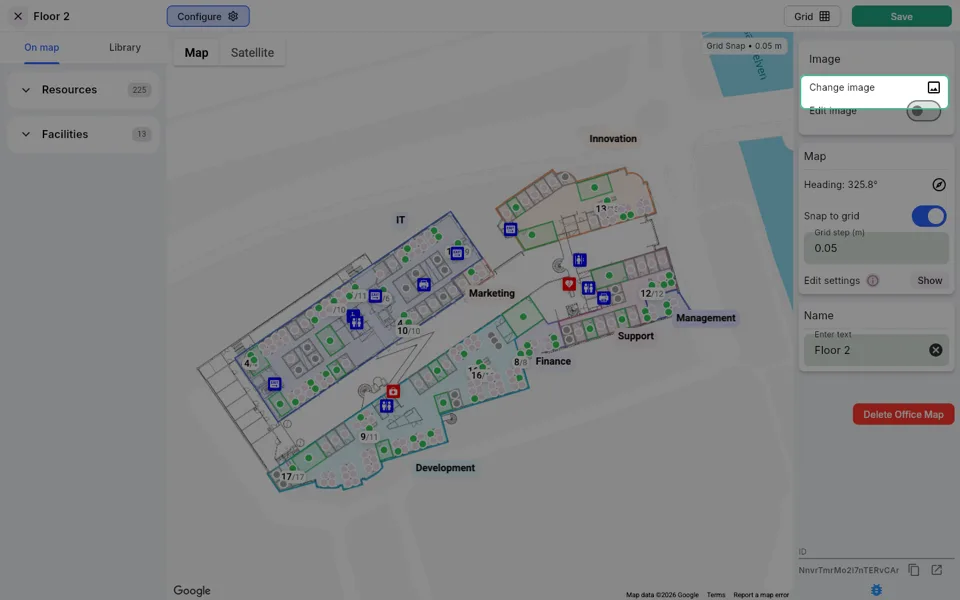
The Configure panel also lets you:
- Adjust the map Heading (compass rotation).
- Enable or disable Snap to grid and set the Grid step in metres.
- Rename the map under the Name field.
- Review or update Edit settings (default sizes and properties for different object types).
Step 5: Browse the Library to find resources
- In the left panel, click the Library tab.
- Expand the Resources section to see all bookable resources that belong to this location but have not yet been placed on the map.
- Resources are grouped by type and cluster. Use the expand/collapse arrows to browse sub-groups.
- You can also expand the Facilities section to see available facilities.
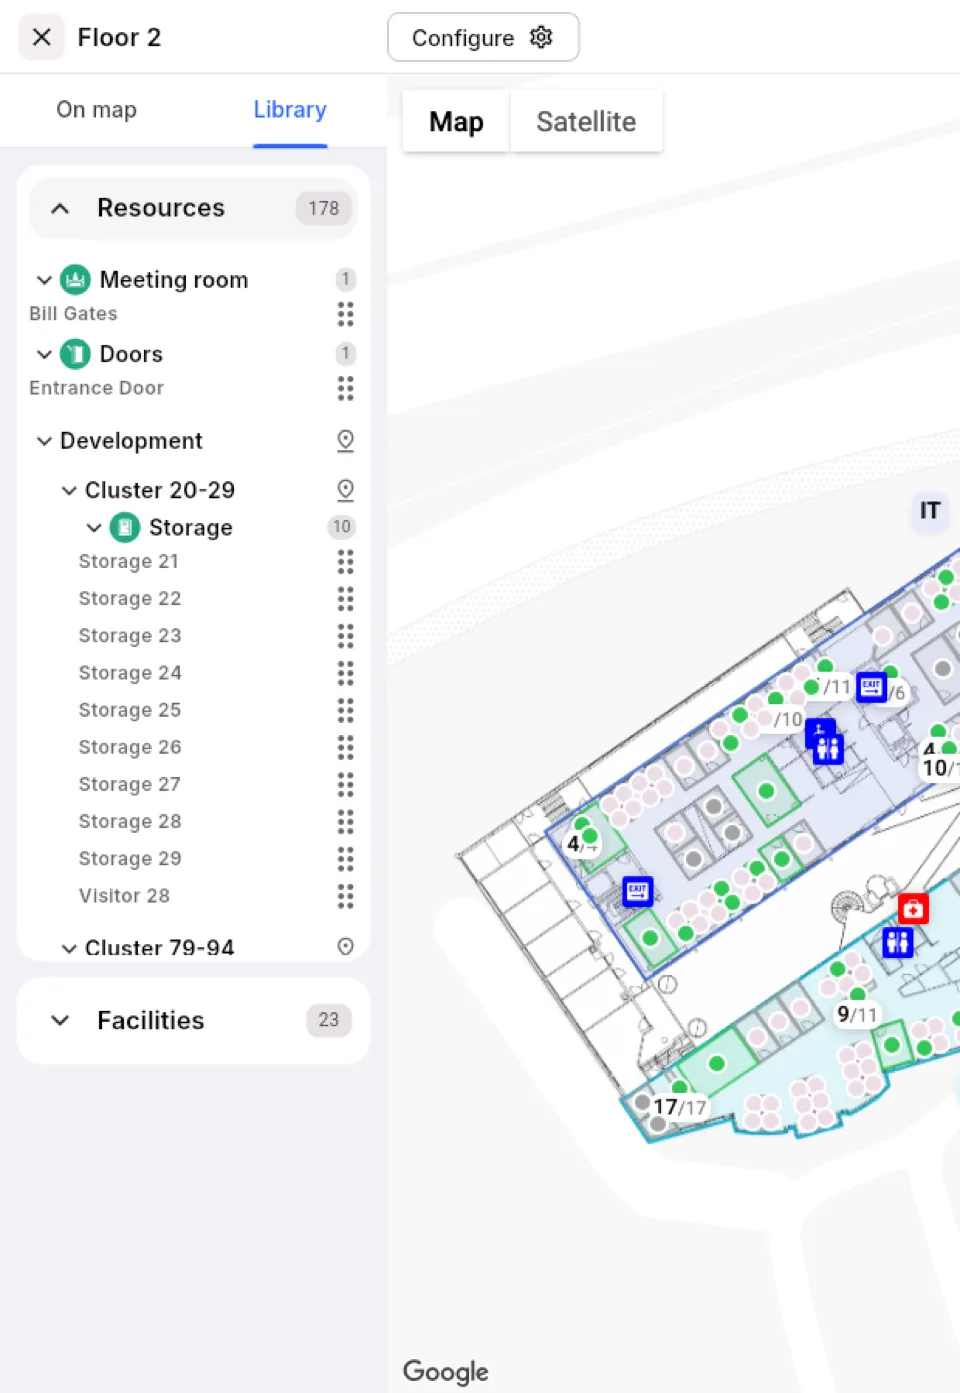
Step 6: Drag a resource onto the map
- In the Library tab, find the resource you want to place.
- Click and drag the drag handle (the grid of dots) next to the resource name onto the map canvas.
- Drop the resource at the correct position over your floor plan image.
- The resource marker appears on the canvas and is labelled with the resource name.
- Click the marker to select it and view or edit its properties in the right panel (marker style, custom icon, annotations, area, and more).
- Repeat for additional resources.
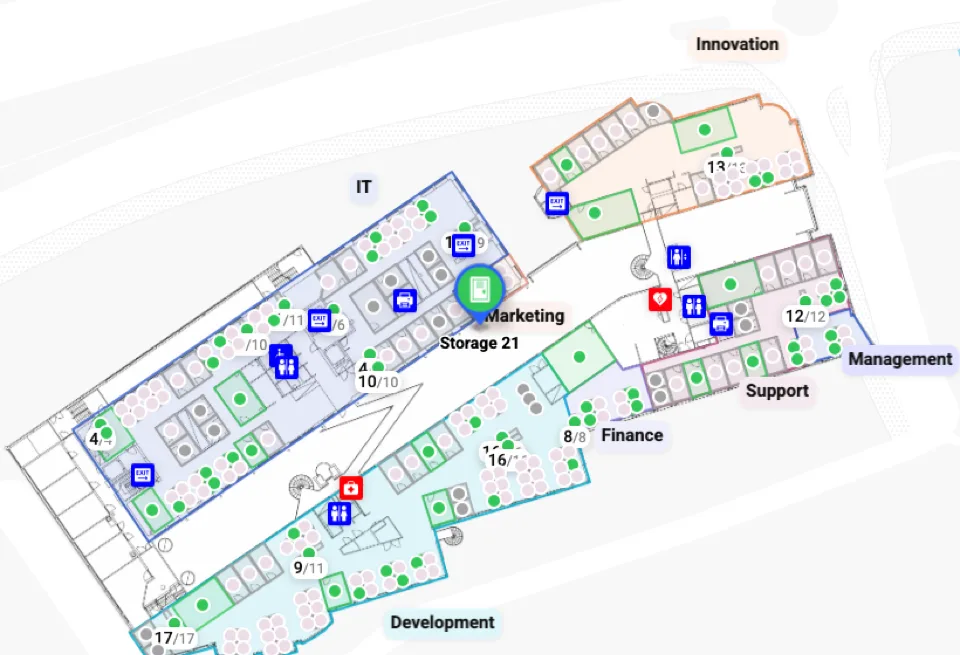
Step 7: Save the map
- When you are satisfied with the resource positions, click Save in the top-right corner of the editor.
- A confirmation dialog appears asking "Do you want to save changes?"
- Click Save to confirm, or No to go back without saving.
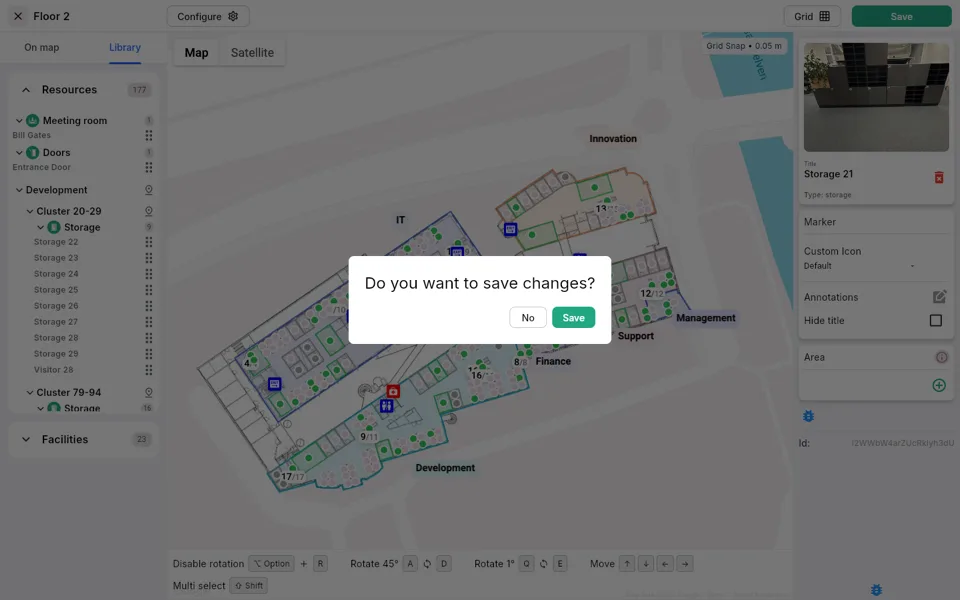
A success message confirms that the office map was saved. The map is now visible to employees in the Awaio app.
Tips
- Grid snapping helps you align resources precisely. Adjust the Grid step value in the Configure panel to match the scale of your floor plan.
- Keyboard shortcuts are shown at the bottom of the editor when a resource is selected: use Q/E to rotate by 1°, A/D to rotate by 45°, and the arrow keys to nudge position.
- To update the floor plan image later, return to Edit from the Office Maps list and use Change image in the Configure panel.
- Use the On map tab in the left panel to quickly see which resources and facilities are already placed, and their counts.
- To remove an office map entirely, open Configure and click Delete Office Map at the bottom of the panel.