

What are Places?
Places are the physical locations that make up your workspace — organised into a hierarchy that Awaio uses to group resources, display maps, and scope check-in data. Every place has a Type that determines where it sits in the hierarchy:
| Type | Description |
|---|---|
| Building | The top-level container. Holds an address and geo-coordinates. |
| Level | A floor or storey within a building. |
| Area | A zone or room within a level. Can be marked as a Lock cluster to hide it from user-facing location lists. |
The Place column in the list shows the full path — for example, Oslo Office | Floor 2 | Development — so you can see exactly where each place sits in the hierarchy at a glance.
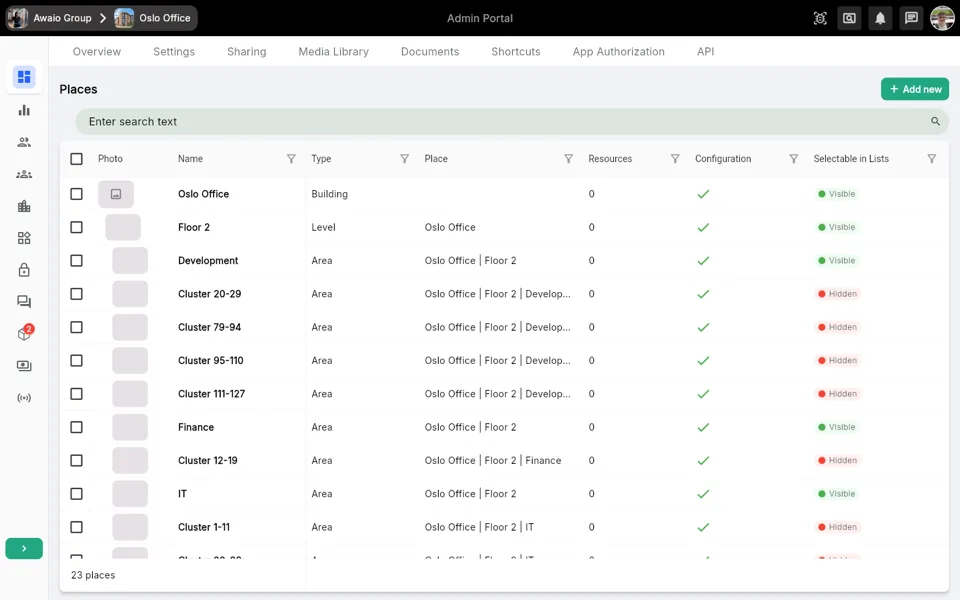
Viewing the Places list
- In the Admin Portal, navigate to Places using the left-hand navigation.
- The list displays all places for the selected community, with columns for Photo, Name, Type, Place (parent path), Resources, Configuration, and Selectable in Lists.
- Use the search field to filter by name.
- Toggle Team places, Shared places, or Shared with teams to show or hide those subsets.
- Click any column header to sort, or use the filter icon (▼) to filter by column value.
- The summary row at the bottom shows the total count of places.
Creating a place
- Click + Add new in the top-right corner of the Places page.
- In the Create Place dialog, select a type: Building, Level, or Area.
- Depending on the type selected:
- Building — search for an address using the address search field. Optionally click Adjust marker position to fine-tune the map pin. Click Assign to campus (optional) if the building belongs to a campus.
- Level — select the parent building from the dropdown.
- Area — select the parent level from the dropdown. Check Lock cluster if this area should be hidden from user-facing location lists.
- Enter a name for the place. For levels and areas you can click Add Level / Add Area to create multiple places in one step.
- A hierarchy preview appears for levels and areas so you can confirm the resulting structure before saving.
- Click Create (or Create [N] [Type]s if creating multiple) to save.
- When creation is complete, click Create another to add more, or Go back to close the dialog.
Viewing and editing a place
Click any row in the Places list to open the place details drawer on the right.
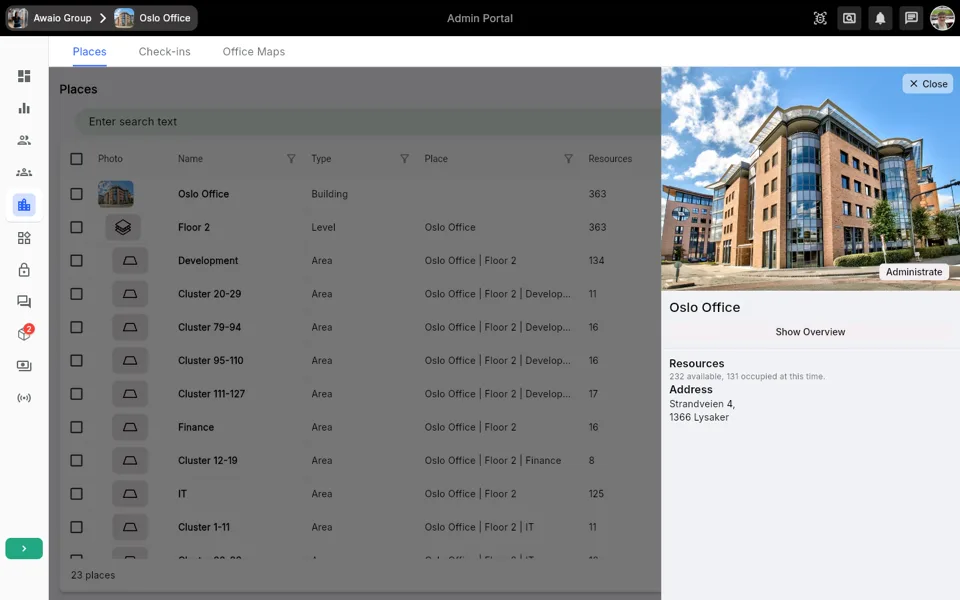
The drawer shows the place photo, name, resource availability summary, and address. Click Administrate to open the full administration view.
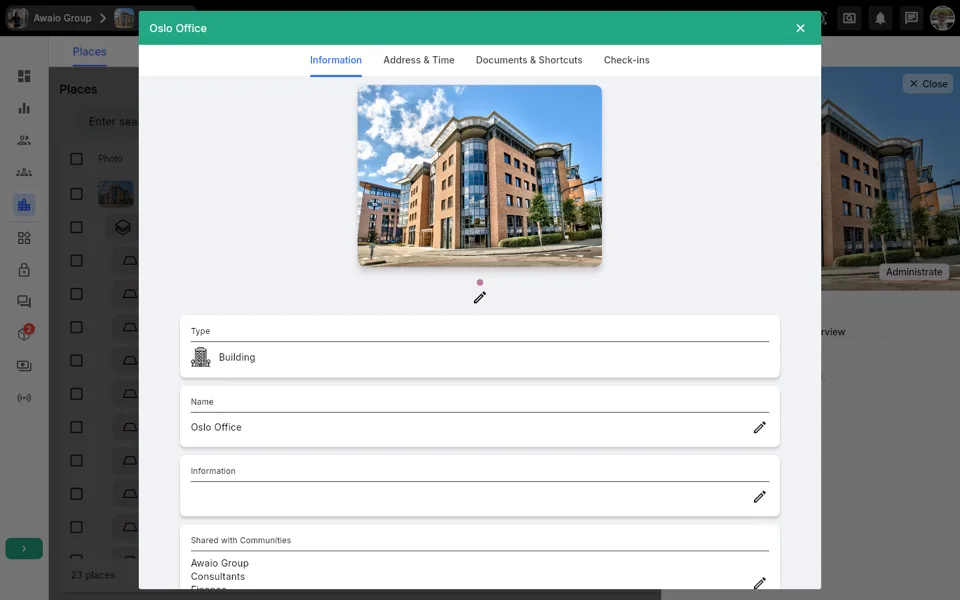
The administration view contains four tabs:
- Information — edit the place name, add an information description, upload a photo, and manage which communities the place is shared with.
- Address & Time — update the street address, coordinates, and time zone (buildings only).
- Documents & Shortcuts — attach documents and shortcuts to the place.
- Check-ins — view check-in activity scoped to this specific place (see below).
To edit a field, click the pencil icon next to it.
Moving a place to a different parent
- Open the place's administration view via Administrate in the drawer.
- On the Information tab, locate the parent field and click the edit icon.
- In the parent picker, browse or search the hierarchy tree and select the new parent.
- A preview of the resulting structure is shown at the bottom of the panel.
- Click Save. A confirmation dialog appears — confirm to complete the move.
Deleting a place
- Open the place's administration view via Administrate in the drawer.
- Locate the delete option and click Delete Place.
- Confirm the deletion in the dialog. The place is permanently removed.
Note: Deleting a place does not automatically delete its child places or resources. Reassign or remove those separately before deleting the parent.
Check-ins explained
A check-in is recorded when a user checks into a booked resource within a place. Awaio surfaces check-in data in two ways:
1. Scoped to a single place — the Check-ins tab
Open any place via Administrate, then select the Check-ins tab. The list shows all bookings and check-in activity for resources that belong to that specific place.
2. Organisation-wide — the standalone Check-Ins page
Navigate to Check-ins in the left-hand navigation to see check-in data across your entire community.
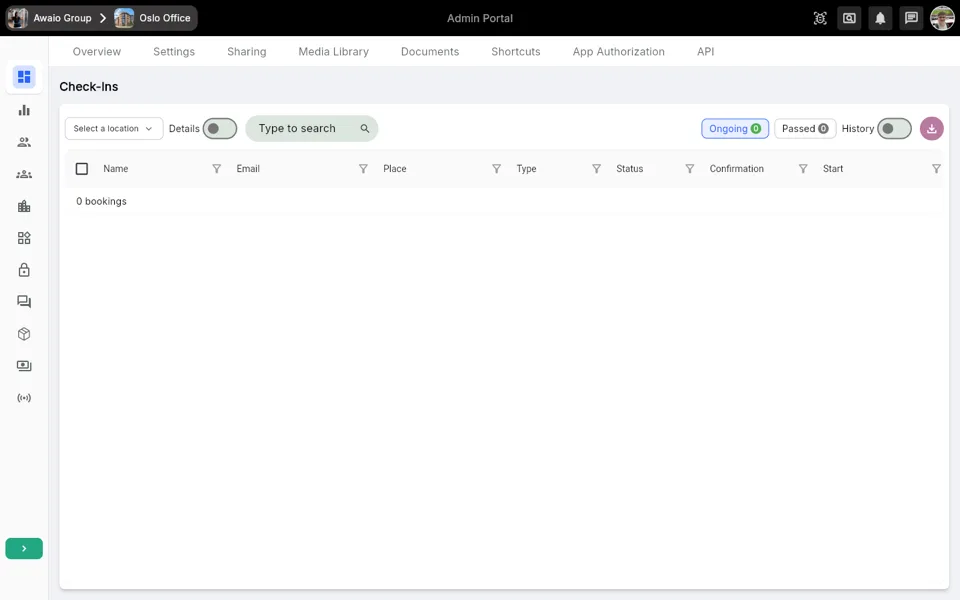
On the Check-Ins page you can:
- Filter by location using the Select a location dropdown.
- Toggle Details to show or hide additional booking information.
- Search by name or email using the search field.
- Switch between Ongoing (active check-ins), Passed (completed), and History (full log) using the controls in the top-right corner.
- Export the list using the download button.
The list columns include Name, Email, Place, Type, Status, Confirmation, and Start.
Tips
- Selectable in Lists controls whether a place appears in user-facing location pickers. Areas marked as Lock clusters are set to Hidden automatically.
- Use the Configuration column checkmark to identify places that have incomplete setup — a Resolve configurations button appears at the top of the list when any places have configuration errors.
- The Place column path (e.g.
Oslo Office | Floor 2 | IT) makes it easy to verify hierarchy depth without opening each place individually. - To check real-time occupancy across a building, open the building's drawer — the Resources section shows how many resources are currently available versus occupied.