

Opening an existing office map for editing
The office map editor lets you position resources and facilities on an interactive floor plan. Start from the Office Maps list to open a map that already exists.
- In the Admin Portal, navigate to Office Maps in the left sidebar.
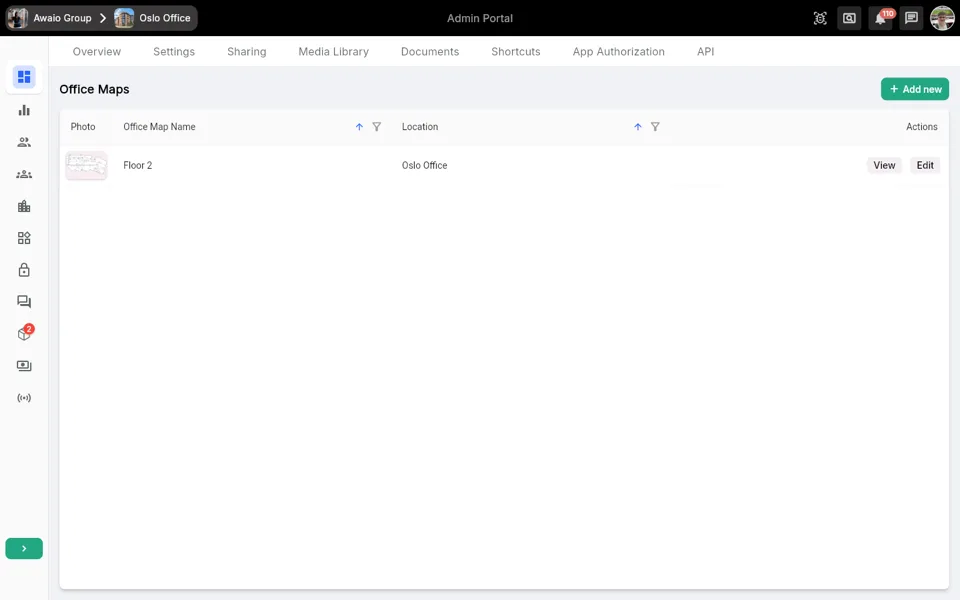
- Locate the map you want to edit in the list. Each row shows a thumbnail photo, the Office Map Name, and its Location.
- Click Edit in the Actions column for that map.
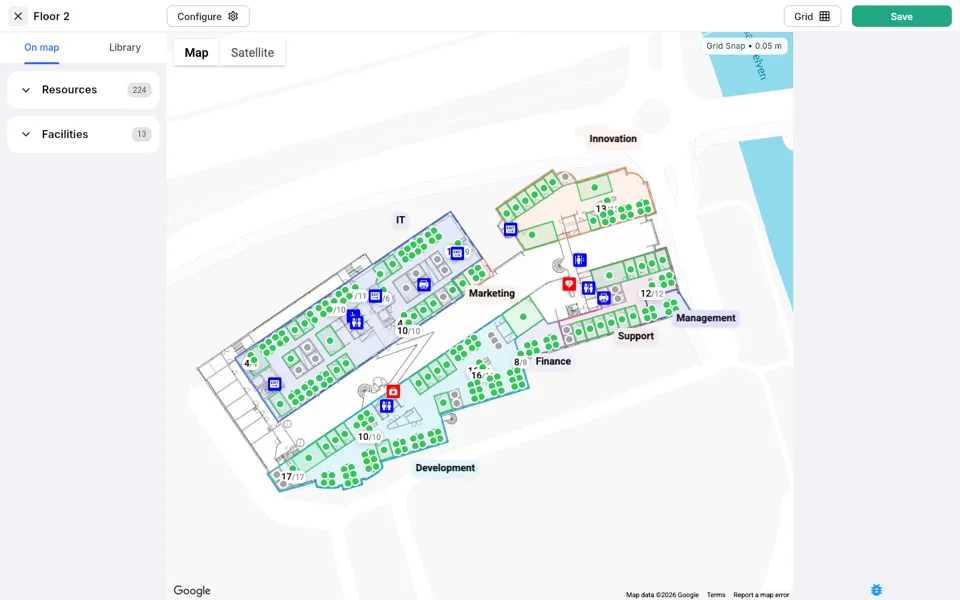
The editor layout
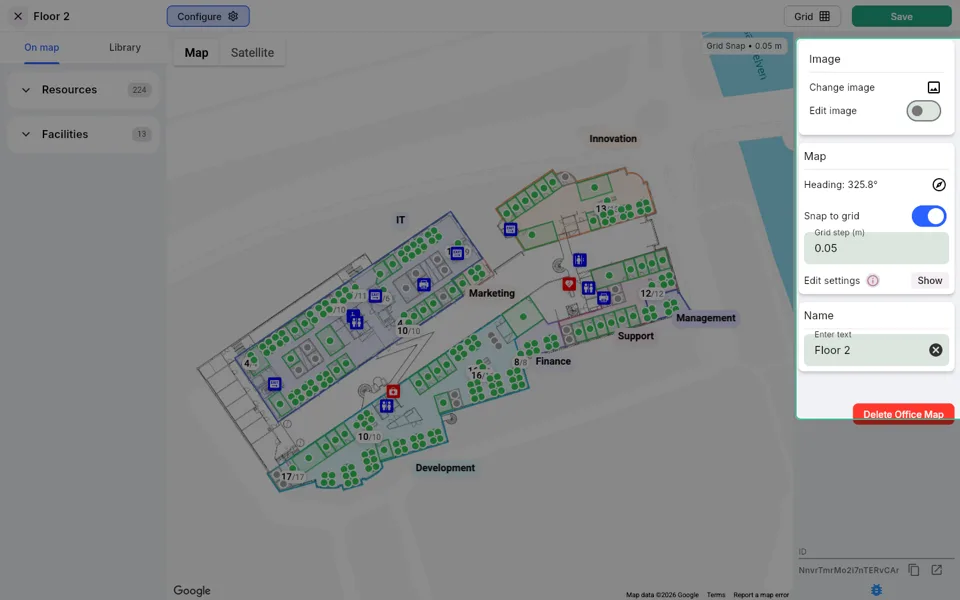
The editor opens full-screen and is divided into three main areas:
- Left panel — the objects sidebar, with On map and Library tabs.
- Centre — the interactive map canvas.
- Top bar — the map name, Configure button, Grid (snap) toggle, and Save button.
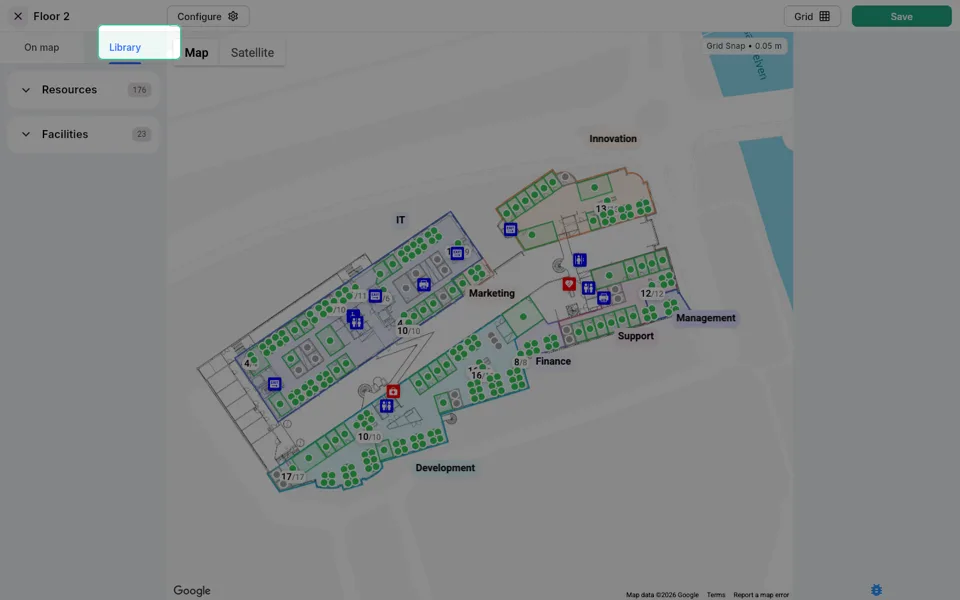
The Library tab — adding resources and facilities
The Library tab shows all resources and facilities that are available to place on the map but have not yet been added.
- Click the Library tab in the left panel.
- Expand the Resources section to see bookable resources available for placement. The badge shows how many are available.
- Expand the Facilities section to see facility items (such as toilets, first-aid points, and printers) available for placement.
- Click an item in either section to select it, then place it on the map canvas.
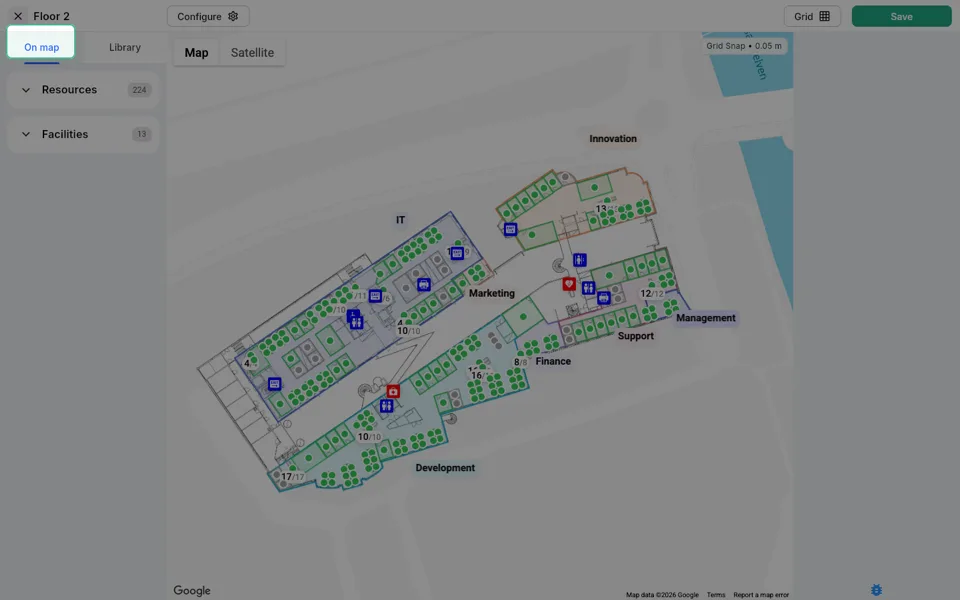
The On map tab — reviewing placed objects
The On map tab lists all resources and facilities that are currently placed on the map canvas.
- Click the On map tab in the left panel.
- Expand Resources to see all resource objects already on the map, with a count badge showing the total.
- Expand Facilities to see all facility objects already on the map.
- Click any item in the list to select and highlight it on the canvas.
The Configure panel
The Configure panel controls map-level settings: the floor plan image, map orientation, grid snapping, the map name, and deletion.
- Click the Configure button (with the settings icon) in the top bar. The panel slides open on the right side of the screen.
- Under Image, click the image icon next to Change image to replace the floor plan image. Toggle Edit image on to resize or reposition the image overlay on the canvas.
- Under Map, click the compass icon next to Heading to enter rotation-editing mode and adjust the map's compass heading. The current heading is shown in degrees.
- Toggle Snap to grid on or off, and set the Grid step (m) value to control how precisely objects snap when you drag them.
- Click Show next to Edit settings to review the default size and shape settings applied to different object types (for example, desks versus meeting rooms).
- Under Name, edit the text field to rename the office map.
- To permanently remove the map, click Delete Office Map at the bottom of the panel.
The Grid snap indicator
The Grid button in the top-right of the editor toggles grid snapping on or off. When snapping is active, the current grid step is shown as a label (for example, Grid Snap • 0.05 m) in the top-right corner of the canvas. You can adjust the grid step value in the Configure panel.
Saving your changes
- When you have finished editing, click Save in the top-right corner of the editor.
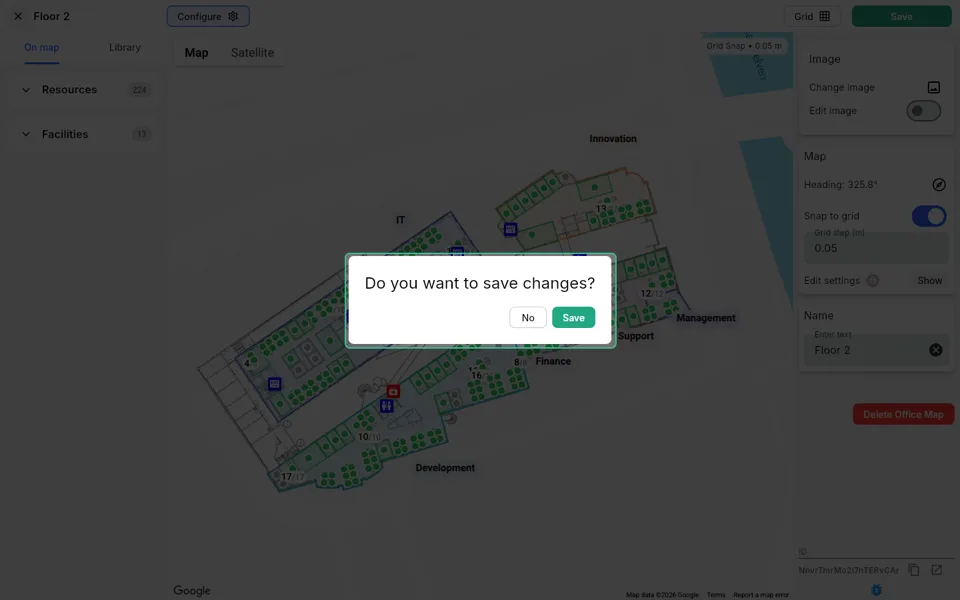
- A confirmation dialog appears: Do you want to save changes?
- Click Save to confirm and publish your changes, or No to return to the editor without saving.
Keyboard shortcuts for editing objects
The editor supports several keyboard modifiers when manipulating objects on the canvas:
| Action | Shortcut |
|---|---|
| Rotate an area | Hold Ctrl and drag a corner |
| Rotate an area by its centre | Hold Ctrl + Meta (⌘/Win) and drag a corner |
| Move a single corner | Hold Alt and drag |
Tips
- Use the On map tab to quickly find and select an object you have already placed, rather than hunting for it on the canvas.
- Keep the Grid step small (for example, 0.05 m) for precise positioning of desks, and use a larger step when positioning larger areas such as meeting rooms.
- The Library tab counts only objects not yet on the map, so its badge decreases each time you add an item to the canvas.
- Changes are not published until you confirm the Save dialog — you can freely explore the editor without affecting the live map.
- To close the editor without saving, click the × icon next to the map name in the top-left corner.