Moving a cluster or area to a different floor is a two-part job: first you reassign its parent in the Places hierarchy, then you reposition it on the destination floor's map — Awaio does not know where on the new floor plan it should sit, so it needs to be placed manually.
Step 1: Open Places
In the Admin Portal, navigate to Places in the left-hand navigation.
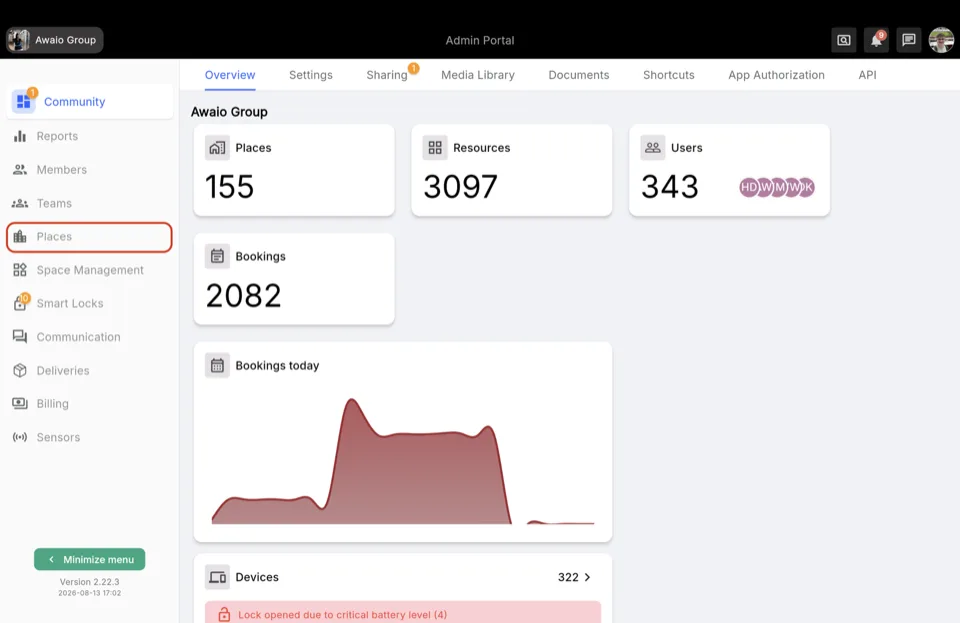
Step 2: Find the cluster or area
On the Places tab, scroll or search the list to find the cluster or area you want to move. Each row shows its Type and its current Place path (for example, Stockholm HQ | Floor 5).
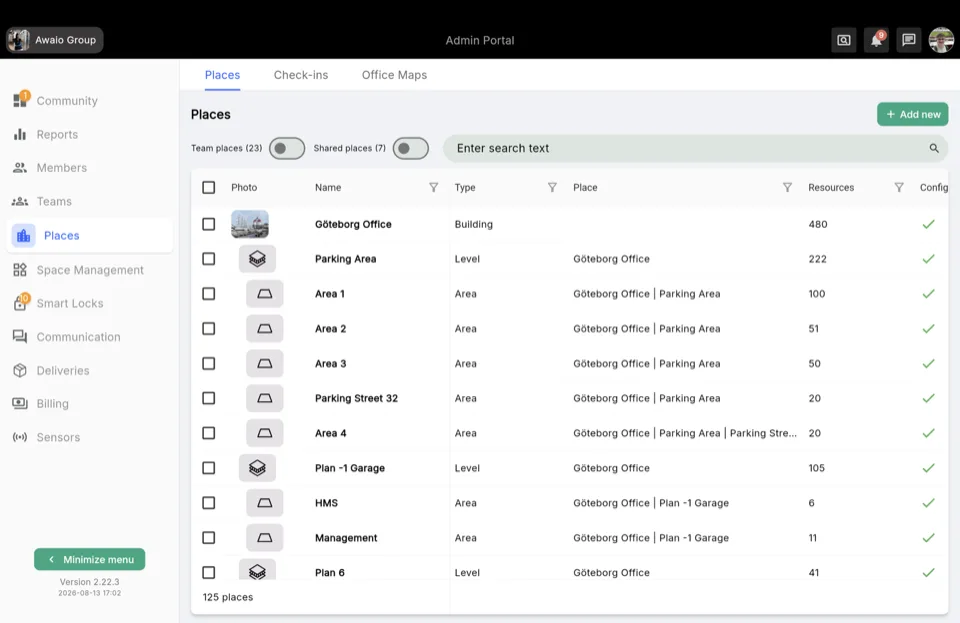
Click the row to open its details drawer.
Step 3: Open Administrate
In the drawer, click Administrate to open the full administration view for that place.
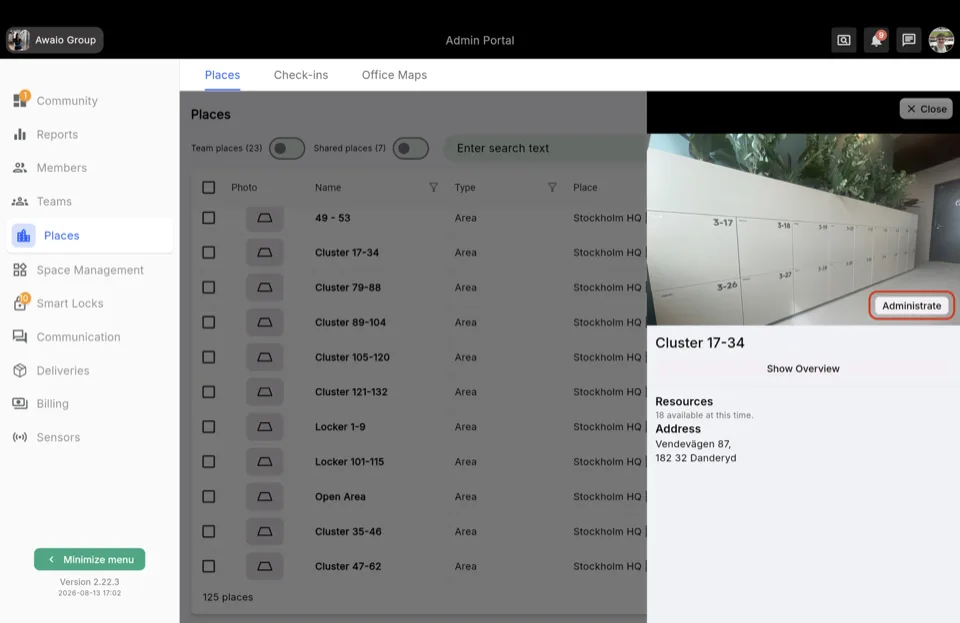
Step 4: Edit the Place field
On the Information tab, scroll down to the Place field — this shows the current parent building and floor. Click the pencil icon next to it.
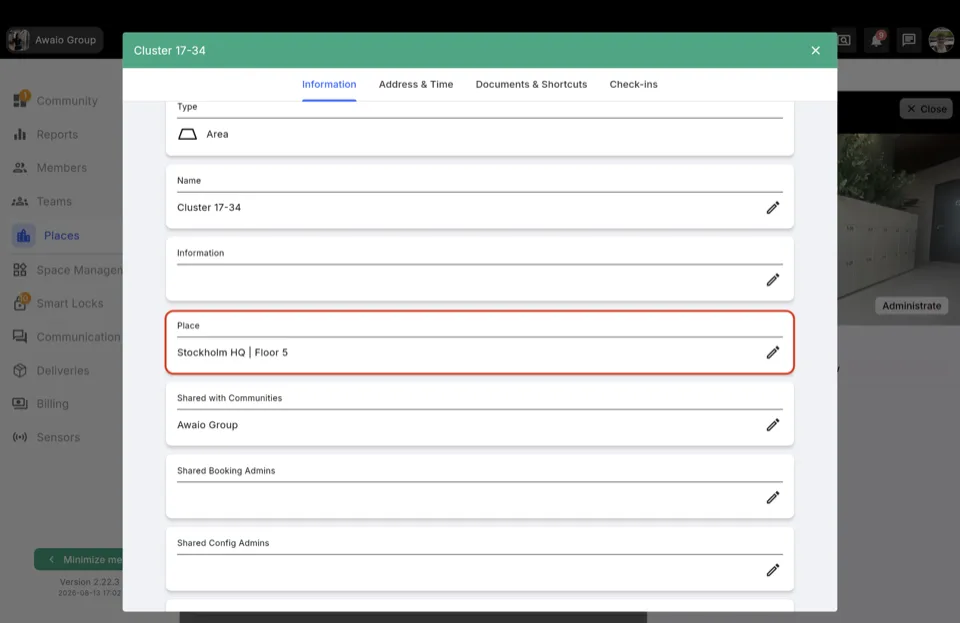
Step 5: Select the new floor
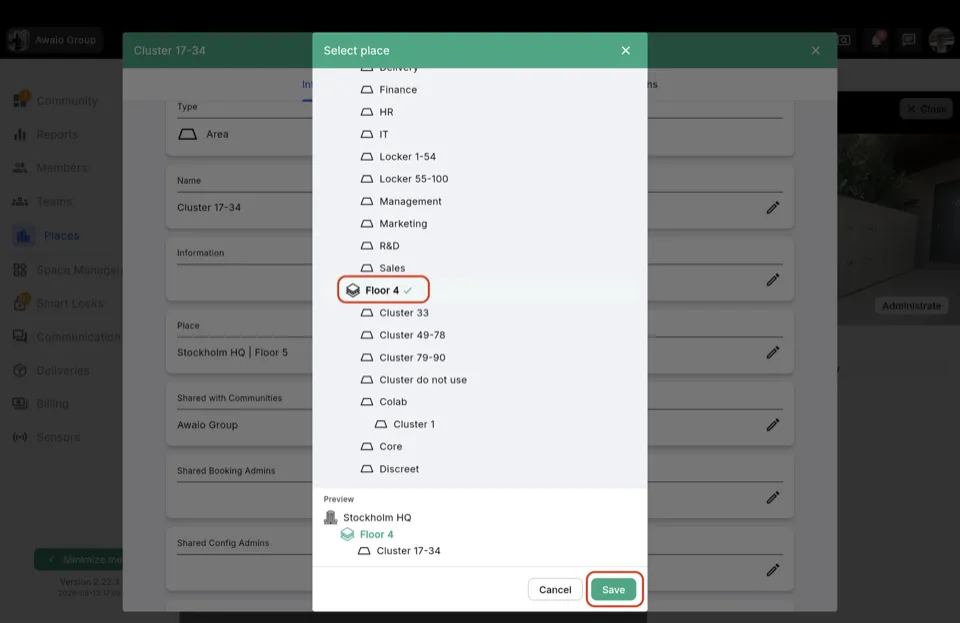
In the Select place picker, browse or search the hierarchy tree and select the destination floor. A Preview at the bottom of the panel shows the resulting location. Click Save.
Step 6: Confirm the move
A Change Place confirmation dialog appears, naming the source and destination floor and how many resources belong to the cluster or area you're moving — all of them move with it. Click Save to confirm.
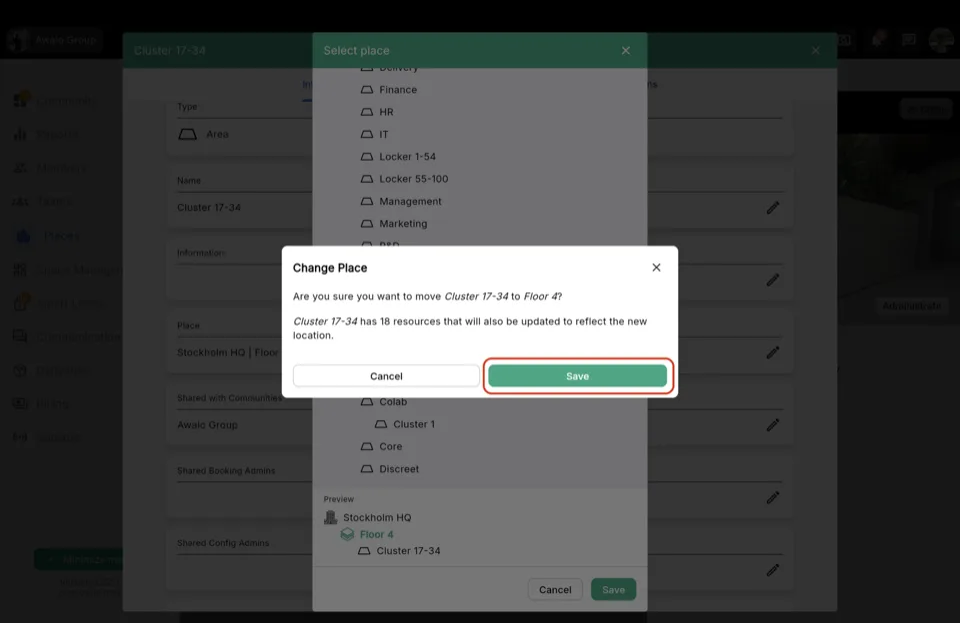
Note: Confirming here only updates the Places hierarchy. The cluster still needs to be positioned on the new floor's map — the next steps cover that.
Step 7: Go to Office Maps
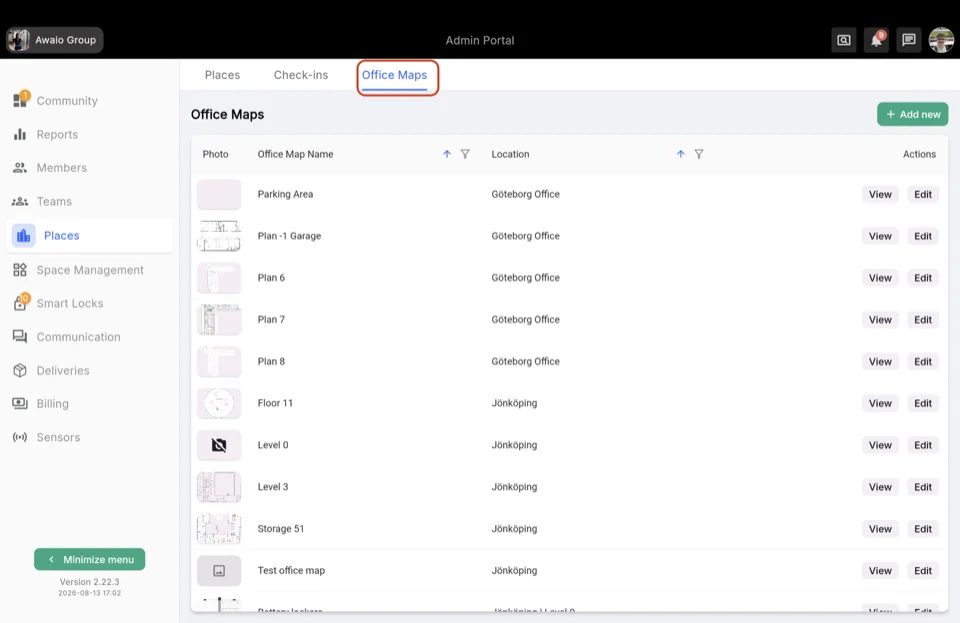
Back on the Places page, switch to the Office Maps tab.
Step 8: Edit the destination floor's map
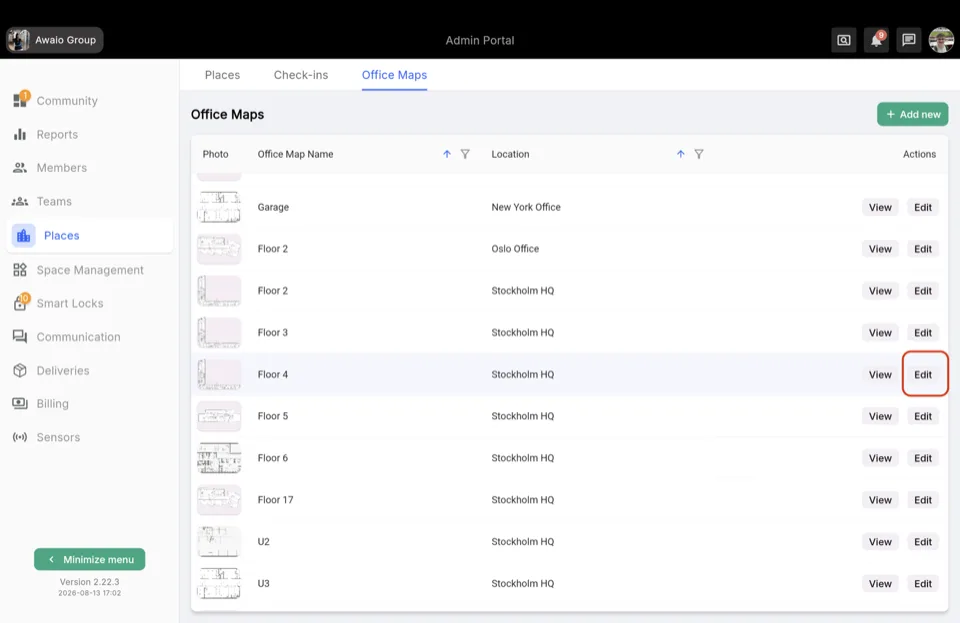
Find the office map for the floor you just moved the cluster to, and click Edit in the Actions column.
Step 9: Find it and reposition it on the map
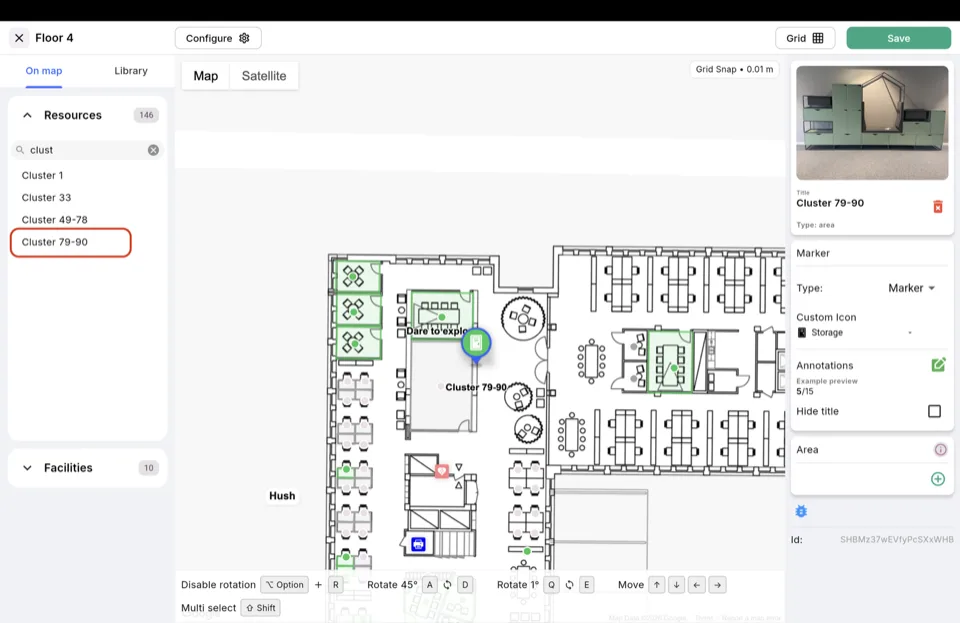
The moved cluster now appears in the On map tab's Resources list, but it lands on the canvas without a meaningful position — search for it by name, select it, and drag it to the correct spot on the new floor plan. Click Save once it's placed correctly.
Moving a single resource instead of a cluster or area
The same two-part process applies to an individual resource (a desk, room, or locker) — only the starting point differs:
- Go to Space Management → Resources.
- Select the resource you want to move.
- Click Administrate.
- On the Place field, click the pencil icon and select the new floor, same as step 5 above.
- Save and confirm the move.
- Go to Office Maps, edit the destination floor's map, find the resource in the On map list, and drag it into place — same as steps 7–9 above.