Connect Awaio to your Google Calendar room resources so users can book Google Rooms directly from Awaio. The integration uses subscriptions through the Google Calendar API, which keeps it fast and reliable, and it works in both directions: bookings created in Awaio sync to Google, and bookings made in Google Calendar sync back to Awaio.
This is a separate integration from Single Sign-On — see Awaio with Google Workspace – Single Sign-On if you're looking to let users sign in with their Google account instead.
Part 1: Set up a Google service account
We recommend running the integration through a dedicated service account with only the lowest permissions needed, rather than a personal admin account.
Step 1: Create the service account
Create an account with a name and email such as awaio@company.com or awaio.booking@company.com.
Step 2: Assign a license
Assign a license that includes email and calendar, so the account has a calendar of its own.
Part 2: Share each room calendar with the service account
The service account needs Full Access to every room you want to sync. In Google Workspace, you grant that by sharing each room's calendar with the service account.
Step 3: Find the room's calendar
In the Google Admin Console, go to Directory → Buildings and resources → Manage resources and open the room. The room's resource email is shown on its details card — you'll need it to add the calendar in the next step.
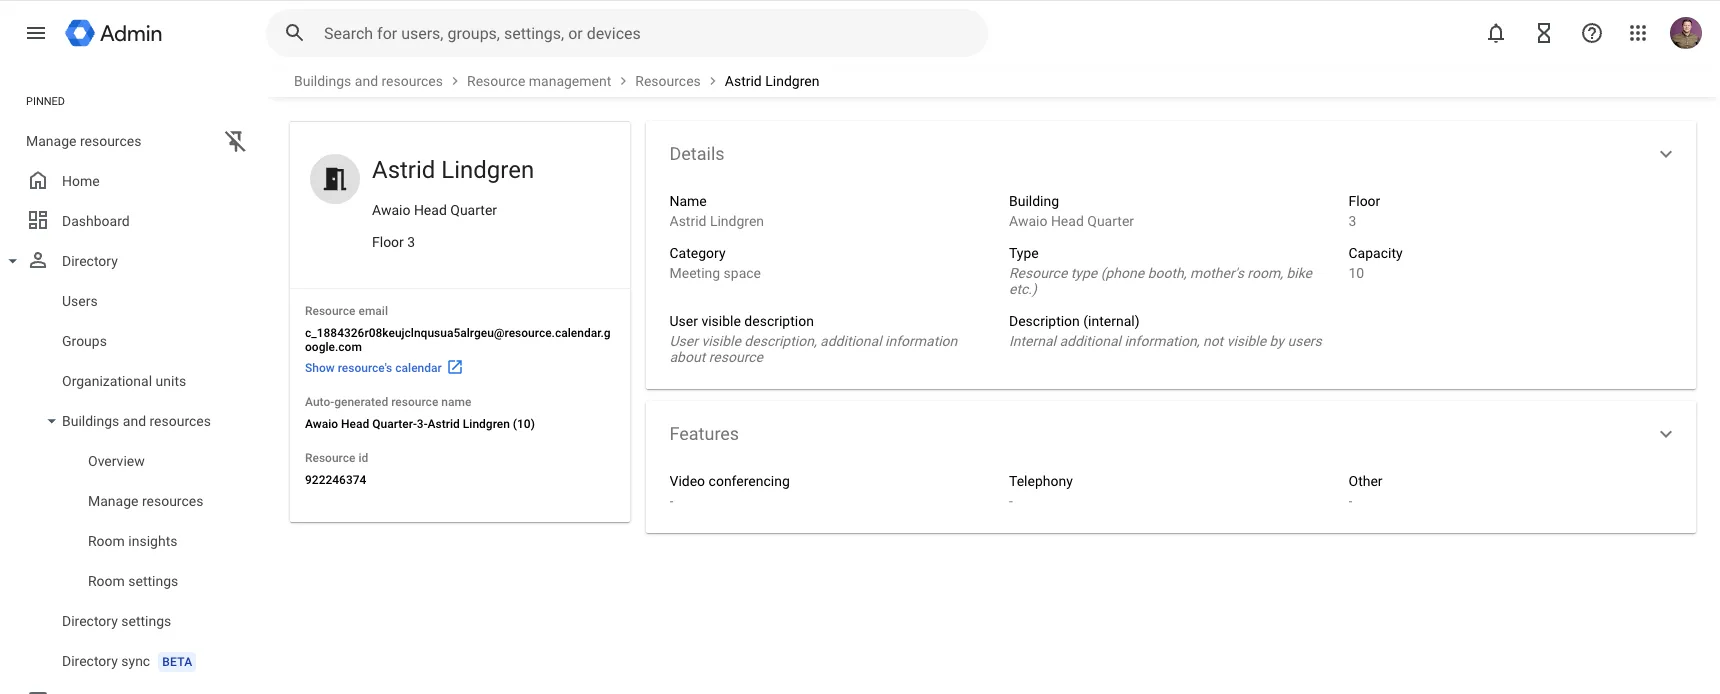
Step 4: Add the rooms as Other calendars
Open calendar.google.com signed in as the service account, and add each room under Other calendars. This step matters: a room must appear as an other calendar in the service account's calendar for Awaio Room Booking to work with full functionality.
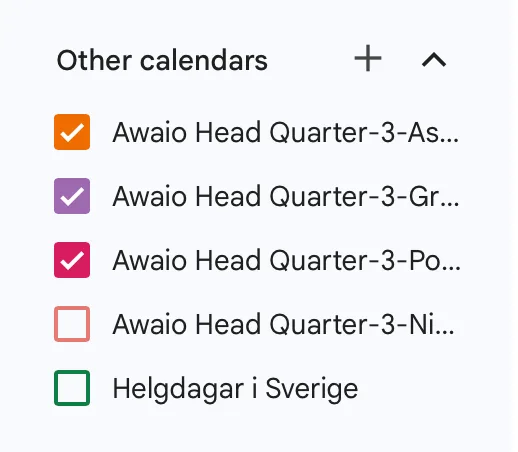
Step 5: Open the calendar's options
Hover the room calendar in the list and click the three dots.
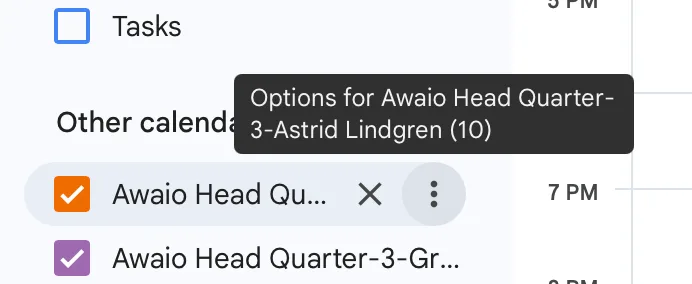
Step 6: Choose Settings and sharing
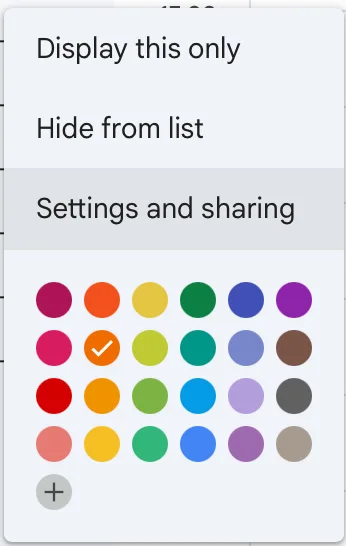
Step 7: Share the calendar with the service account
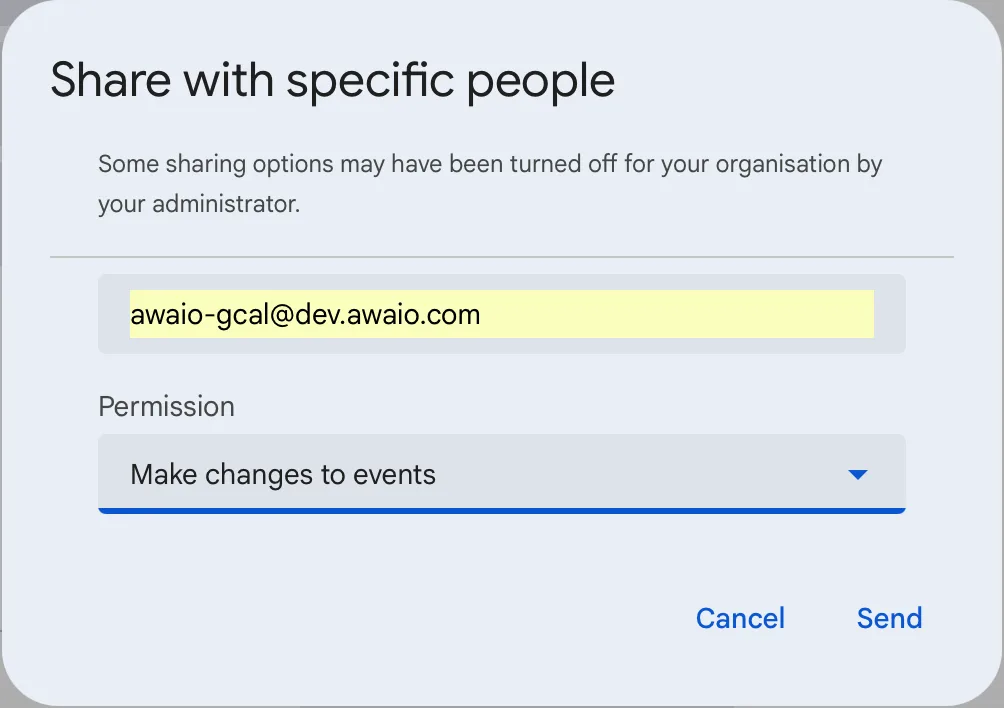
Under Share with specific people, add the service account email and set the permission to Make changes to events.
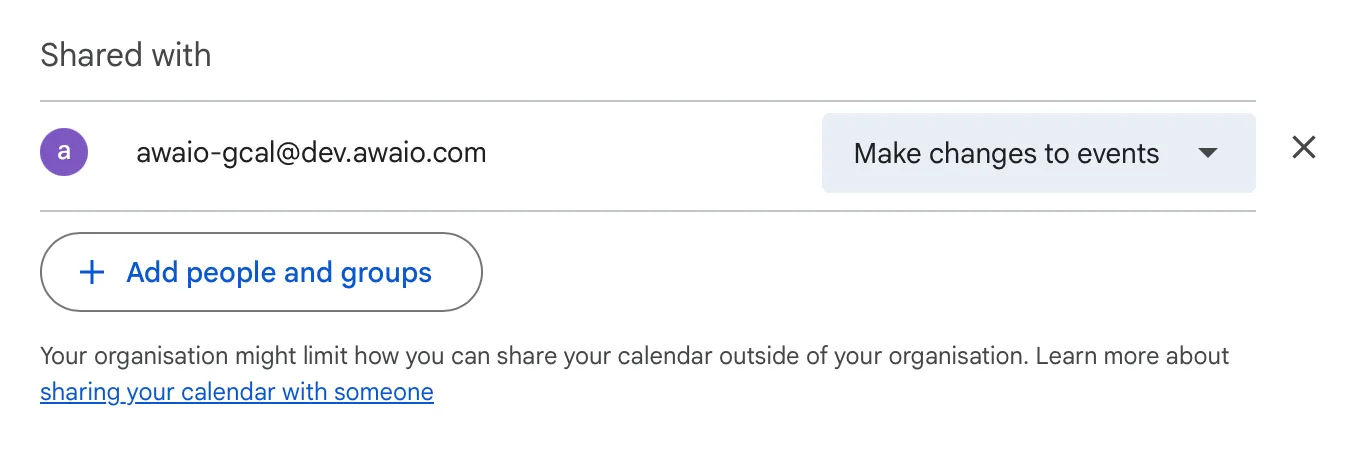
Step 8: Confirm the sharing settings
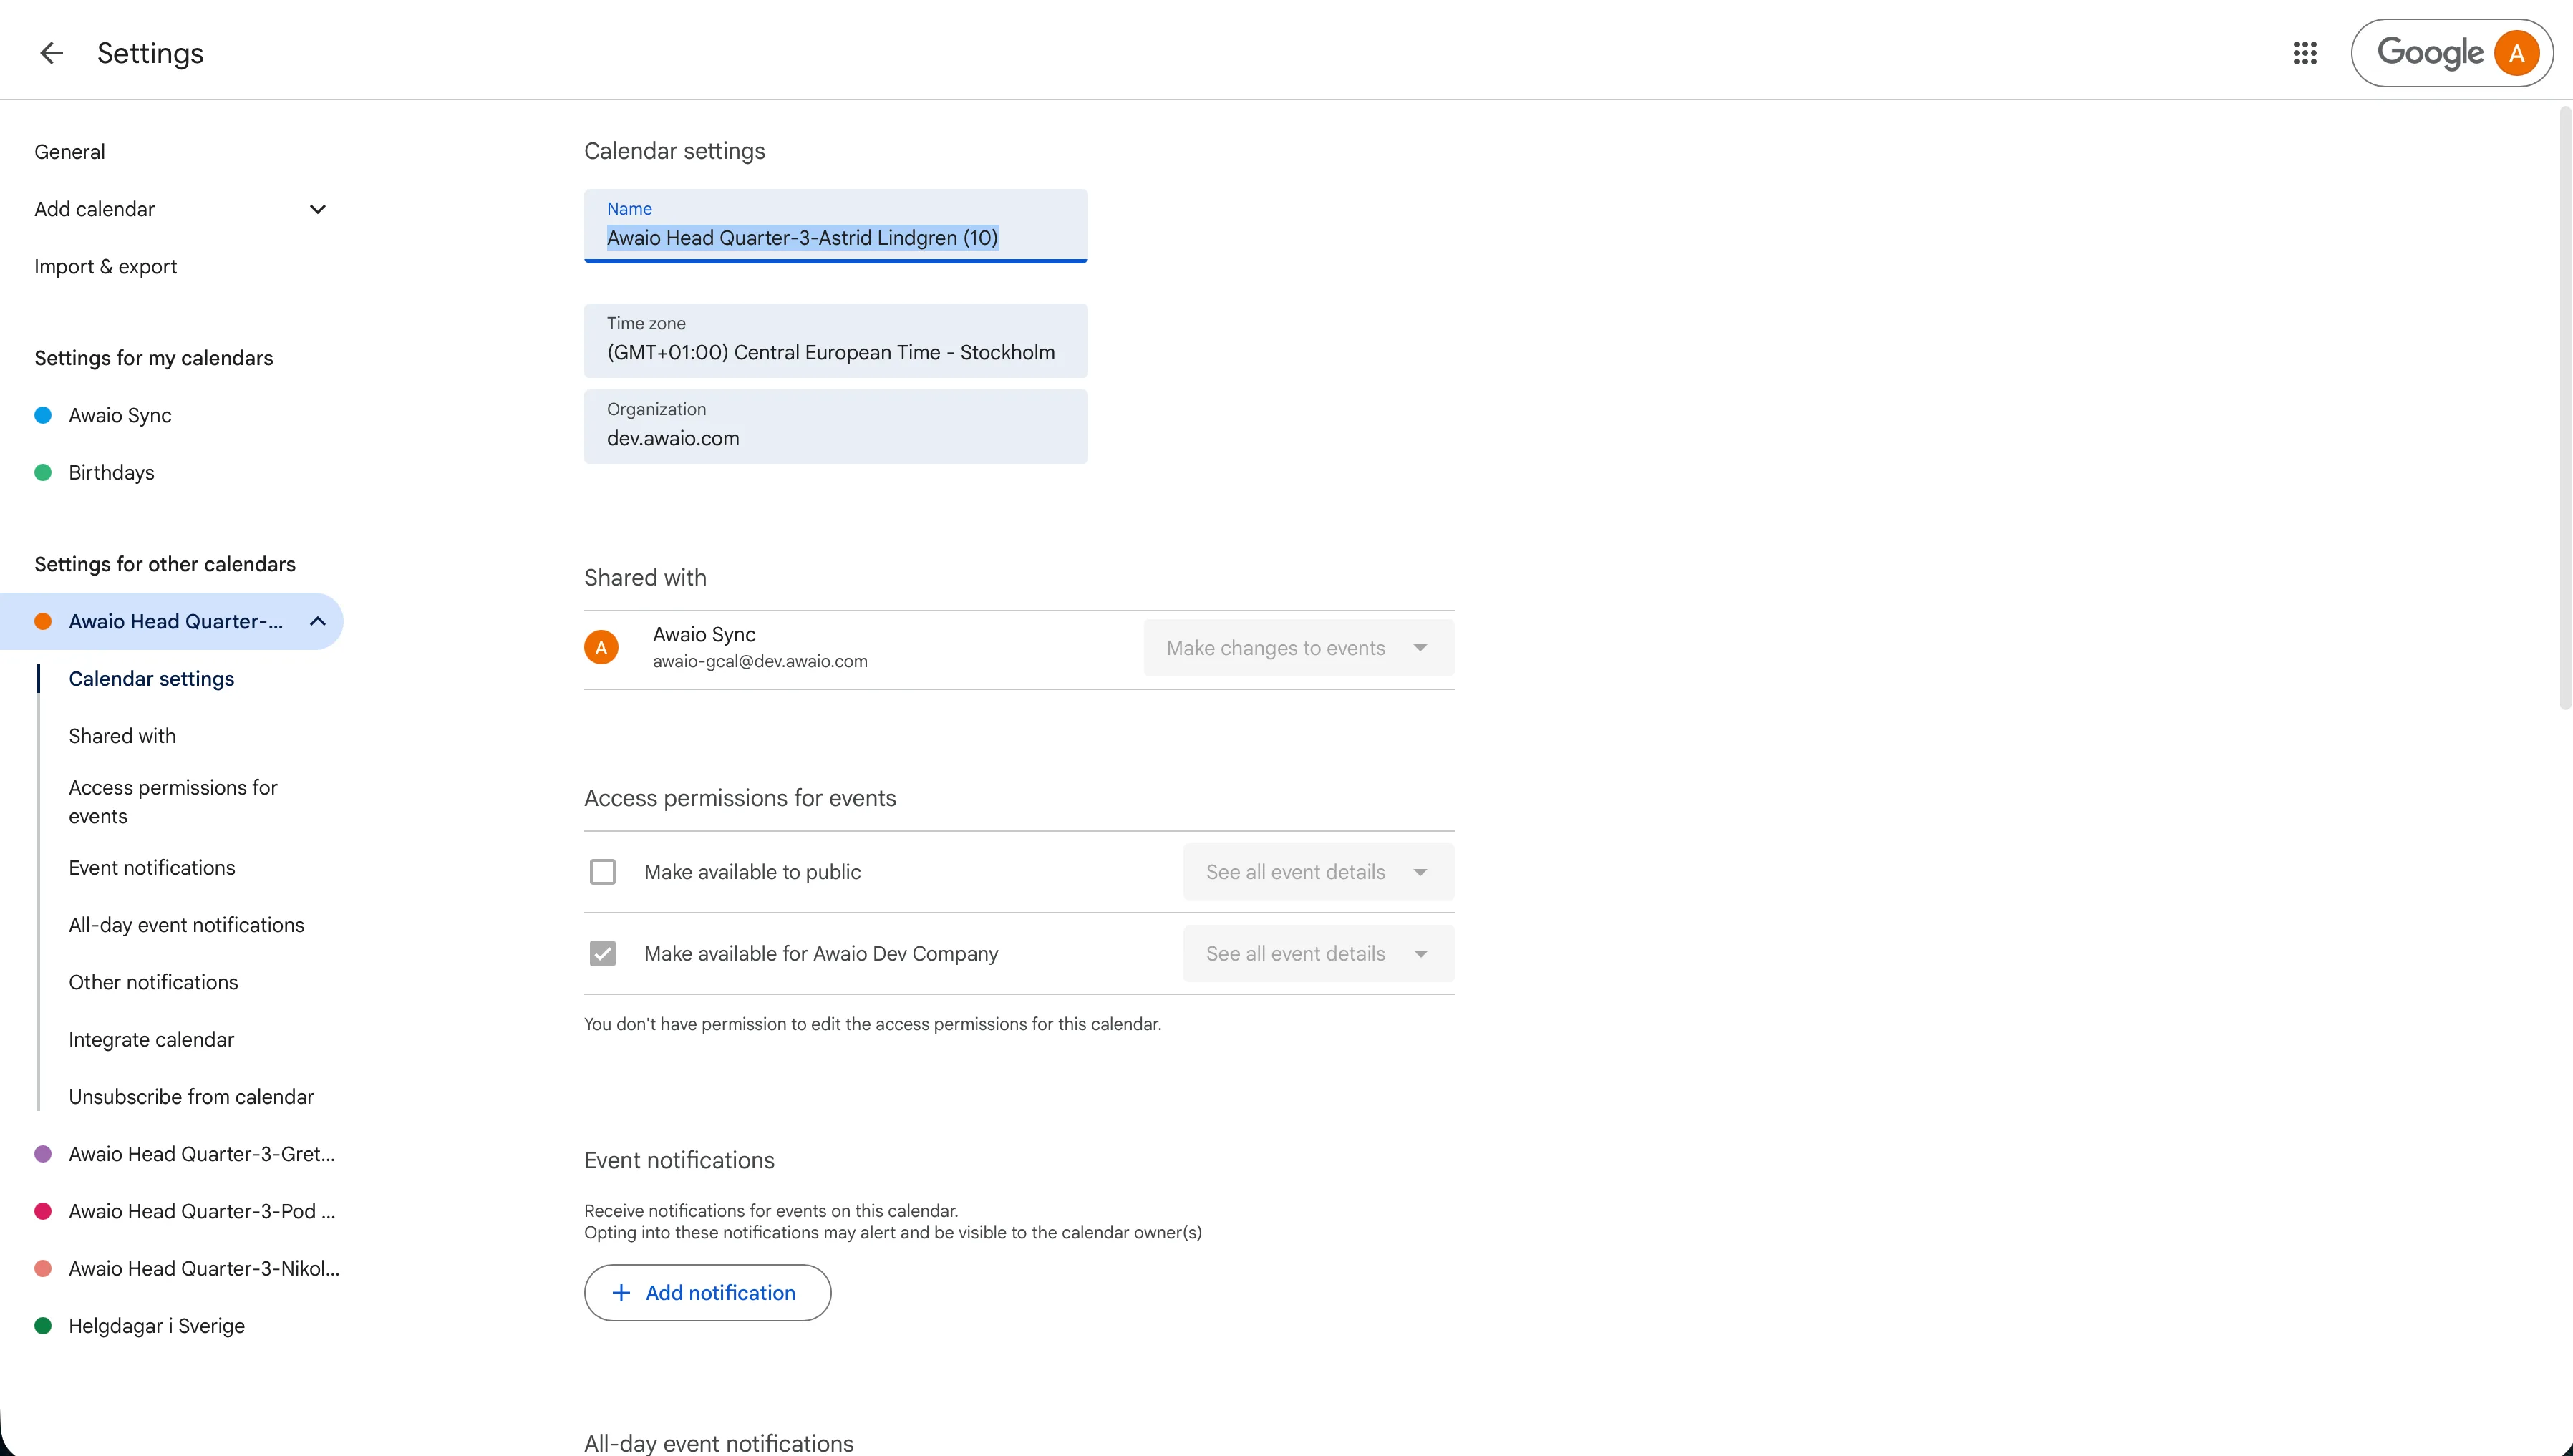
The calendar's settings page should now list the service account under Shared with with Make changes to events. Repeat Steps 4–7 for every room you want to sync.
Part 3: Set up the integration in Awaio
Step 9: Open Calendar Integrations
Log in to the Awaio Web Portal and go to Space Management → Calendar Integrations. Click Add new, then choose Google Workspace.
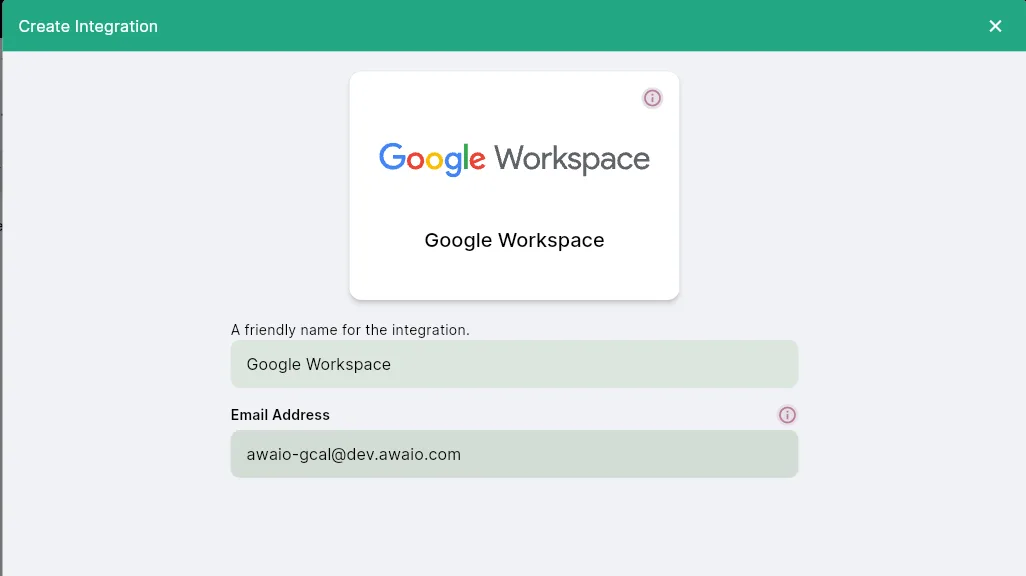
Step 10: Name the integration and enter the service account email
Give the integration a friendly name, then enter the email address of the service account you created in Part 1.
Step 11: Consent and sign in
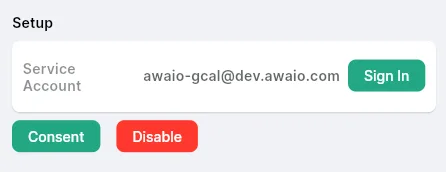
Click Consent to approve the Awaio Room Booking app in Google, then Sign In with the service account.
Part 4: Activate the integration on one resource
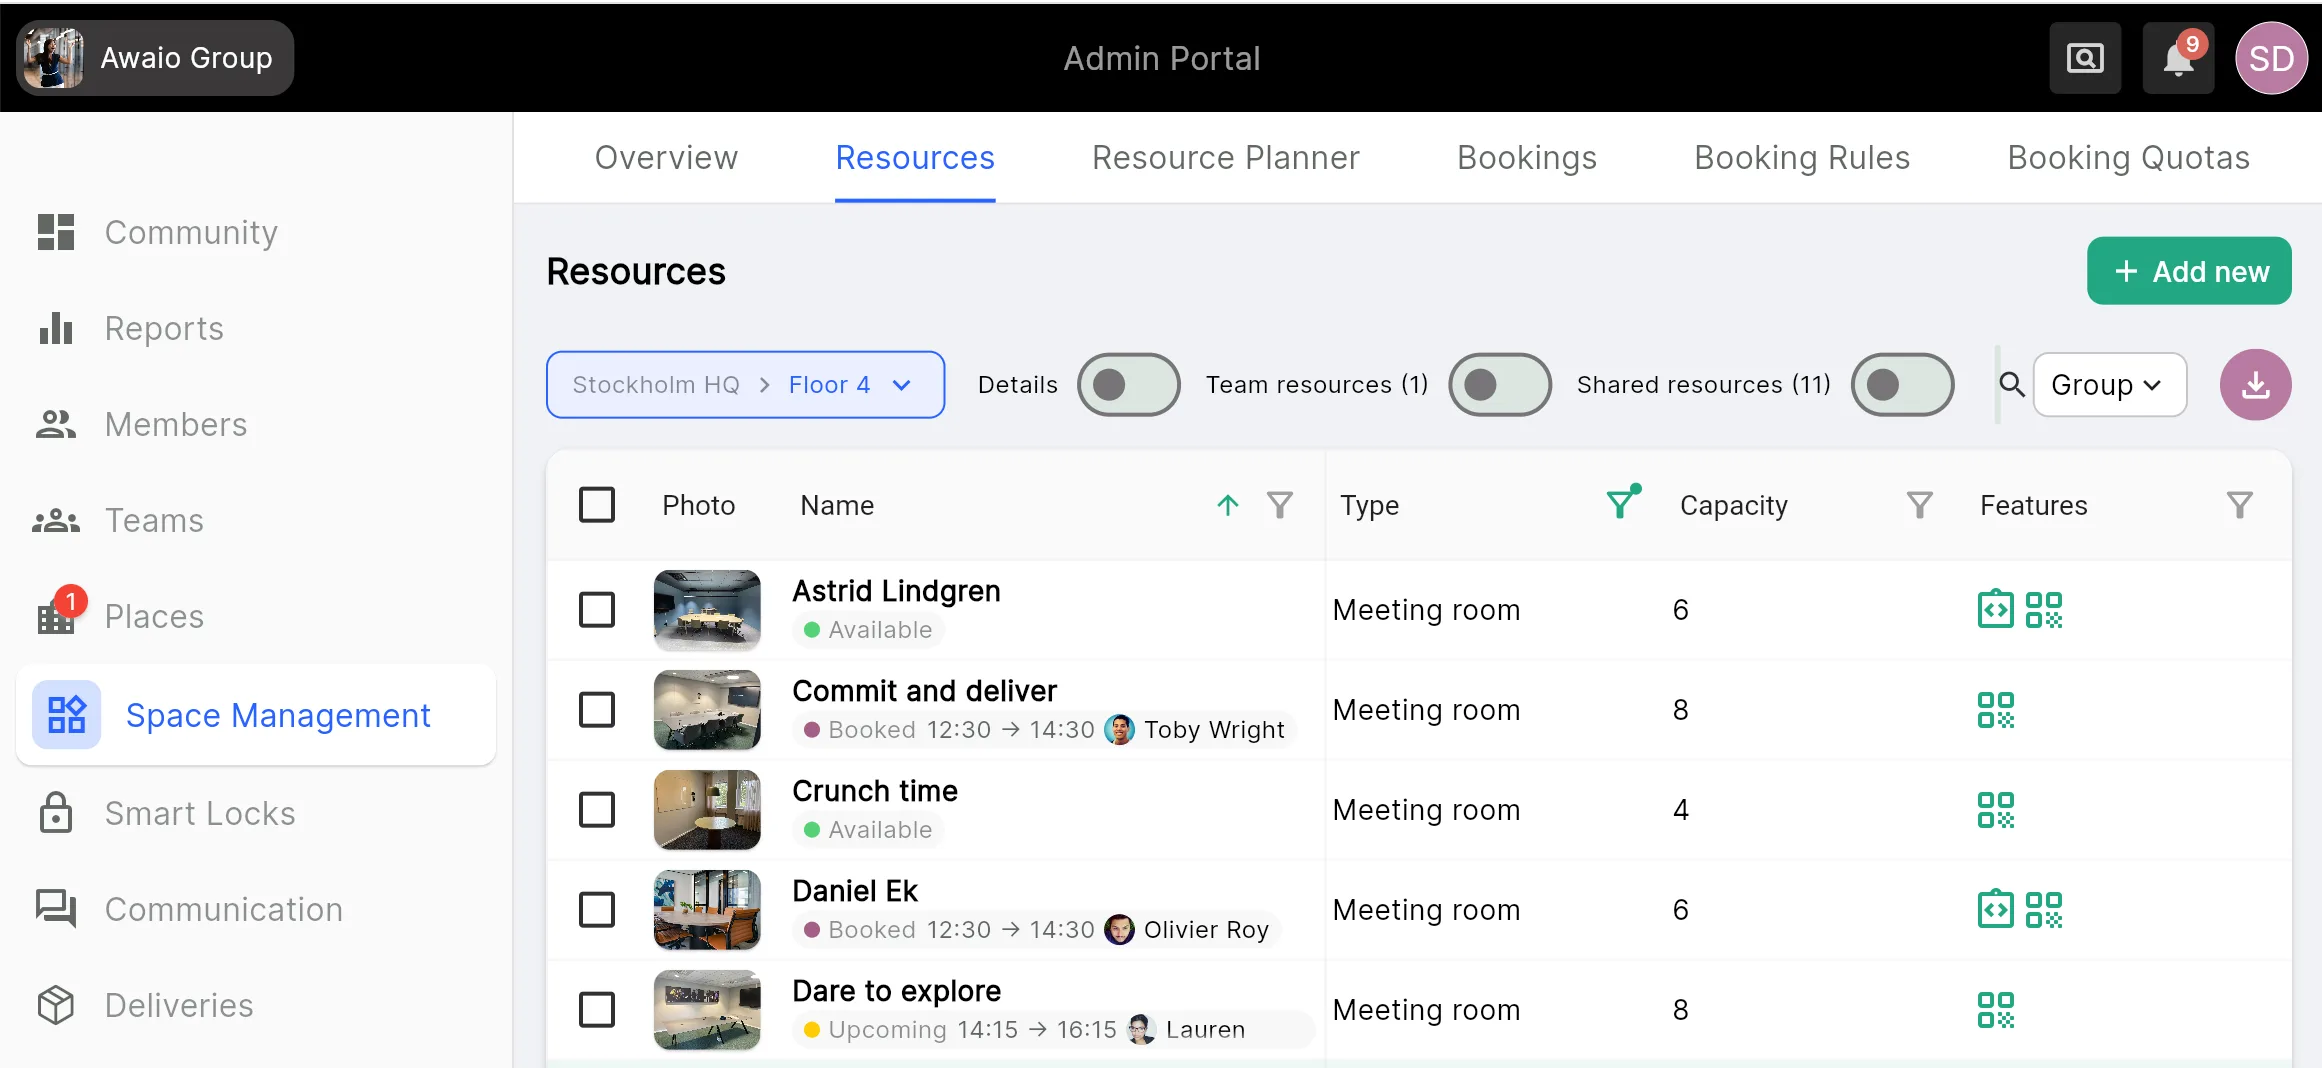
Step 12: Open Resources
Go to Space Management → Resources.
Step 13: Create or open a room
Click Add new in the upper right corner to create a room from a template, or click an existing resource in the list.
Step 14: Choose Administrate
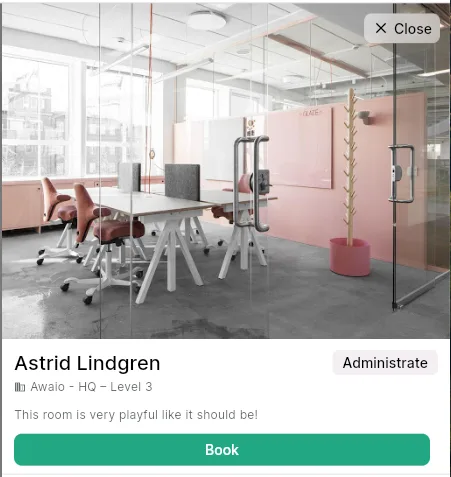
Step 15: Open Booking Settings
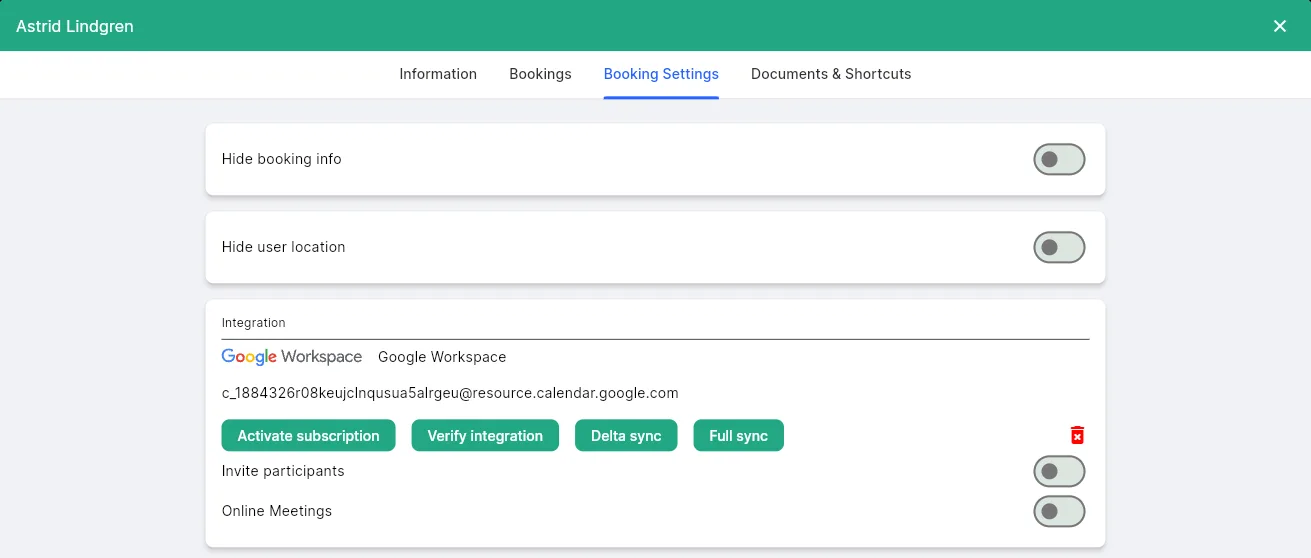
Go to Booking Settings and click the pencil icon next to Integration.
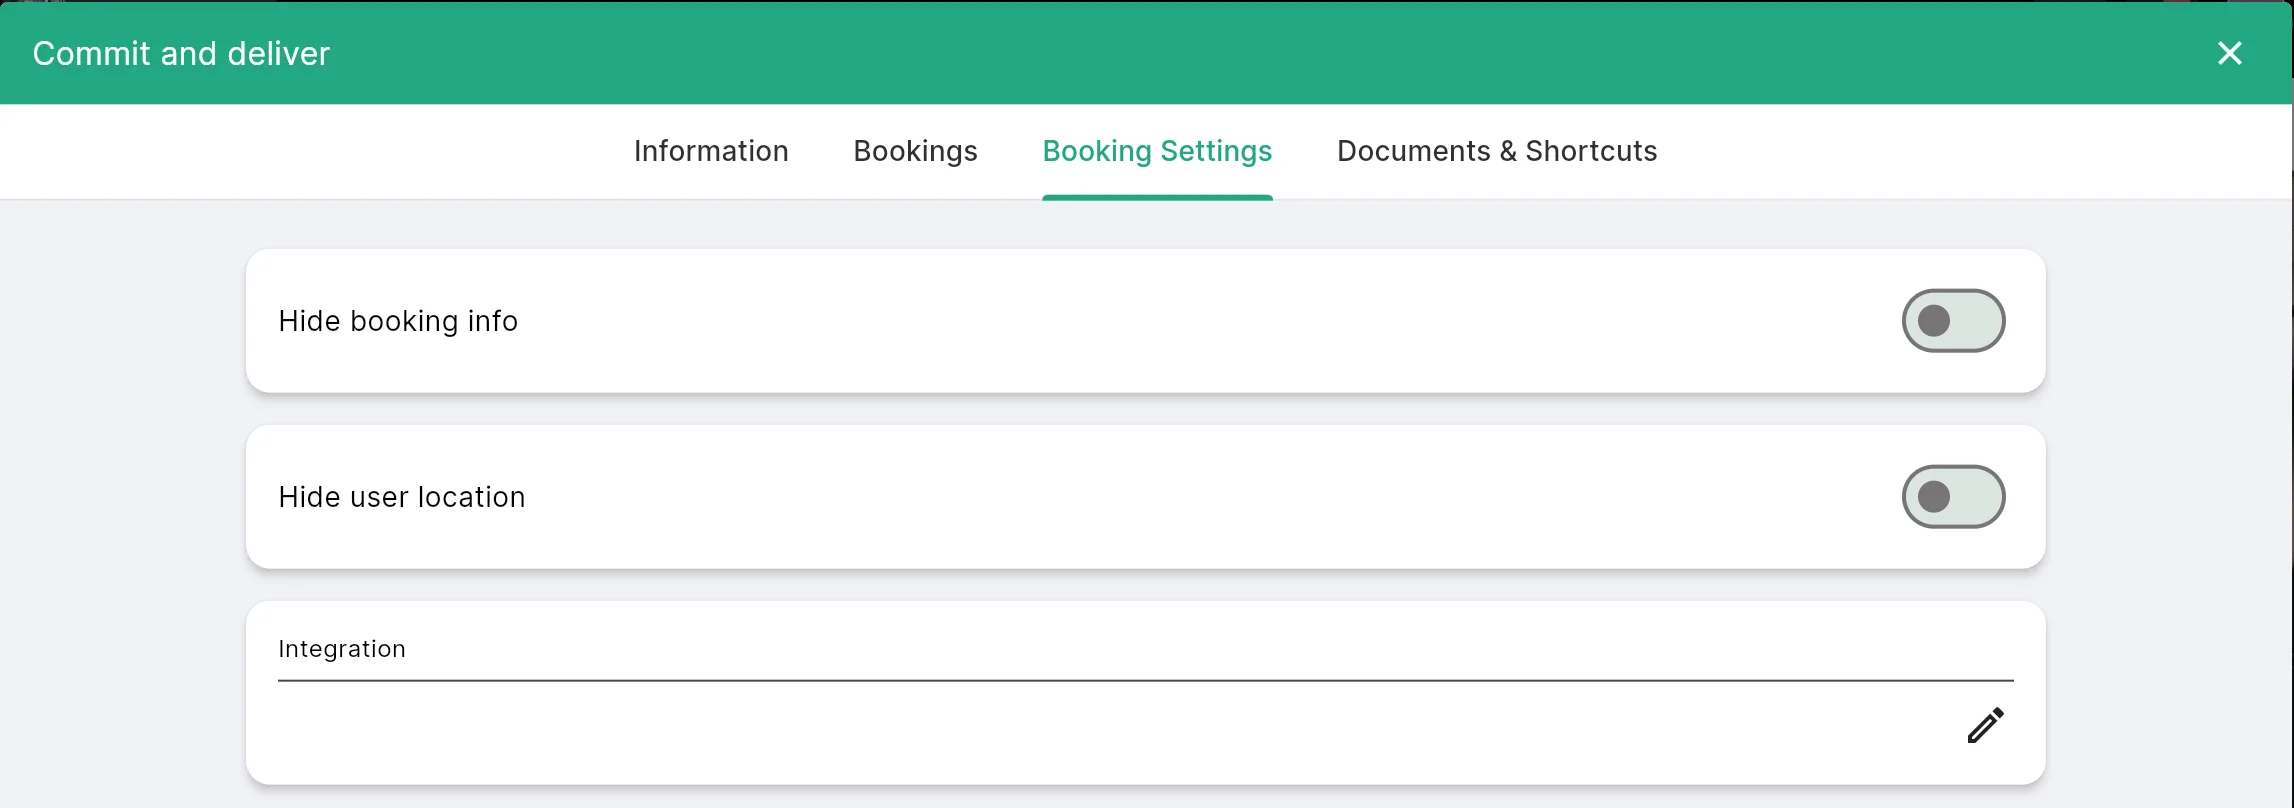
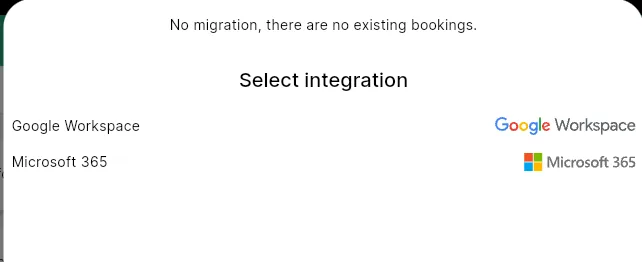
Step 16: Select the integration
Choose the Google Workspace integration you created in Part 3.
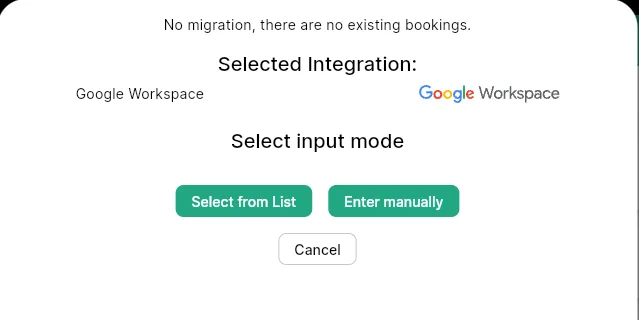
Step 17: Match the room to its Google calendar
Choose Select from List (shows up to 250 rooms) or Enter manually if the room isn't in the list. Awaio also checks whether there are existing bookings in the Awaio platform that need to be transferred.
Step 18: Activate and verify sync
Once a room is linked, use the options on its Booking Settings tab to manage the sync:
- Activate subscription: turns on room sync immediately, instead of waiting for it to enable automatically after a couple of hours
- Verify integration: checks that the integration has the correct permissions on the Google room calendar
- Delta sync / Full sync: forces a sync update for the room — Delta for an incremental sync, Full for a complete resync
- Online Meetings: has the Google room calendar generate a Google Meet link for each booking
- Invite participants: has the Google room calendar send participants an email invitation
Part 5: Activate the integration on multiple resources
If you have many rooms, connect them in bulk from the integration itself instead of one resource at a time.
Step 19: Open the integration
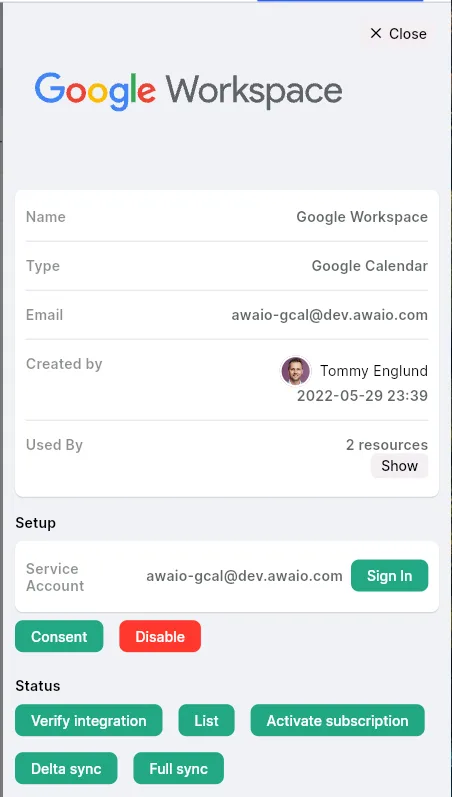
Go to Space Management → Calendar Integrations and click your Google Workspace integration. The panel shows the service account, how many resources use it, and the sync controls.
Step 20: List the Google room resources
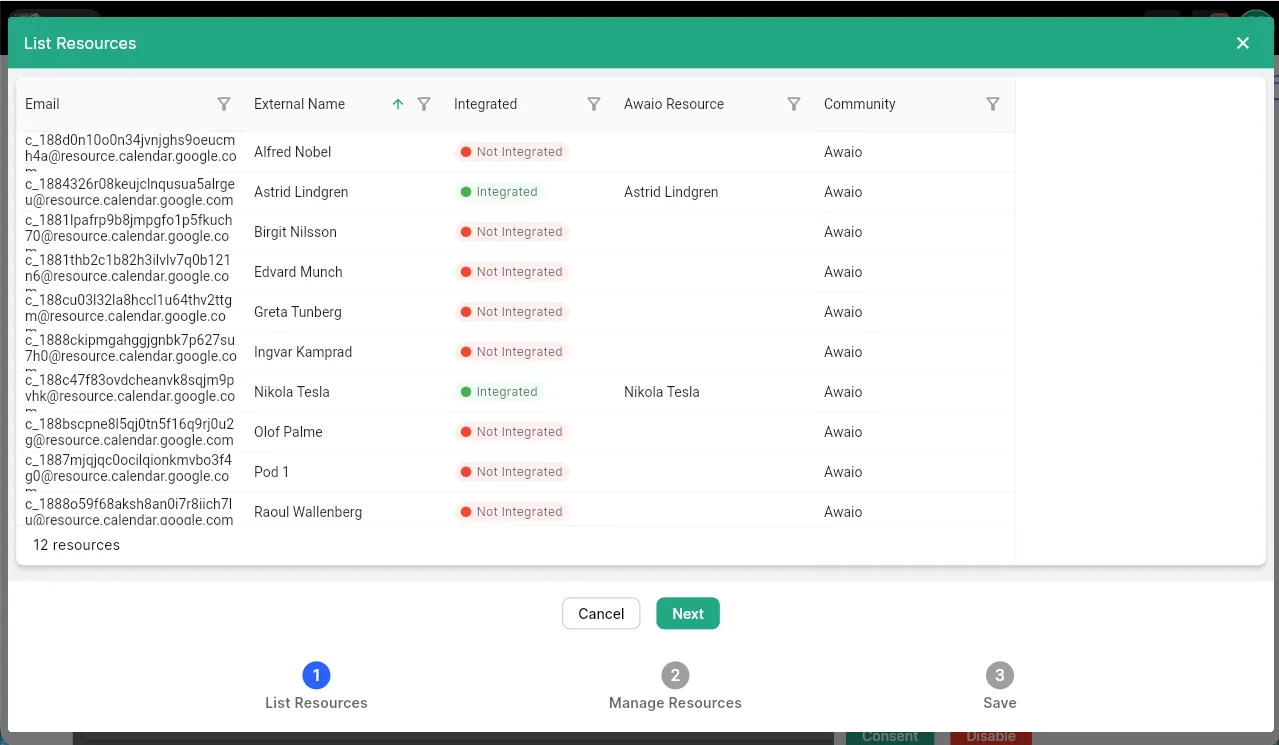
Click List to fetch the room resources from Google. Each row shows the room's calendar email, its external name, and whether it is already integrated.
Step 21: Match the rooms
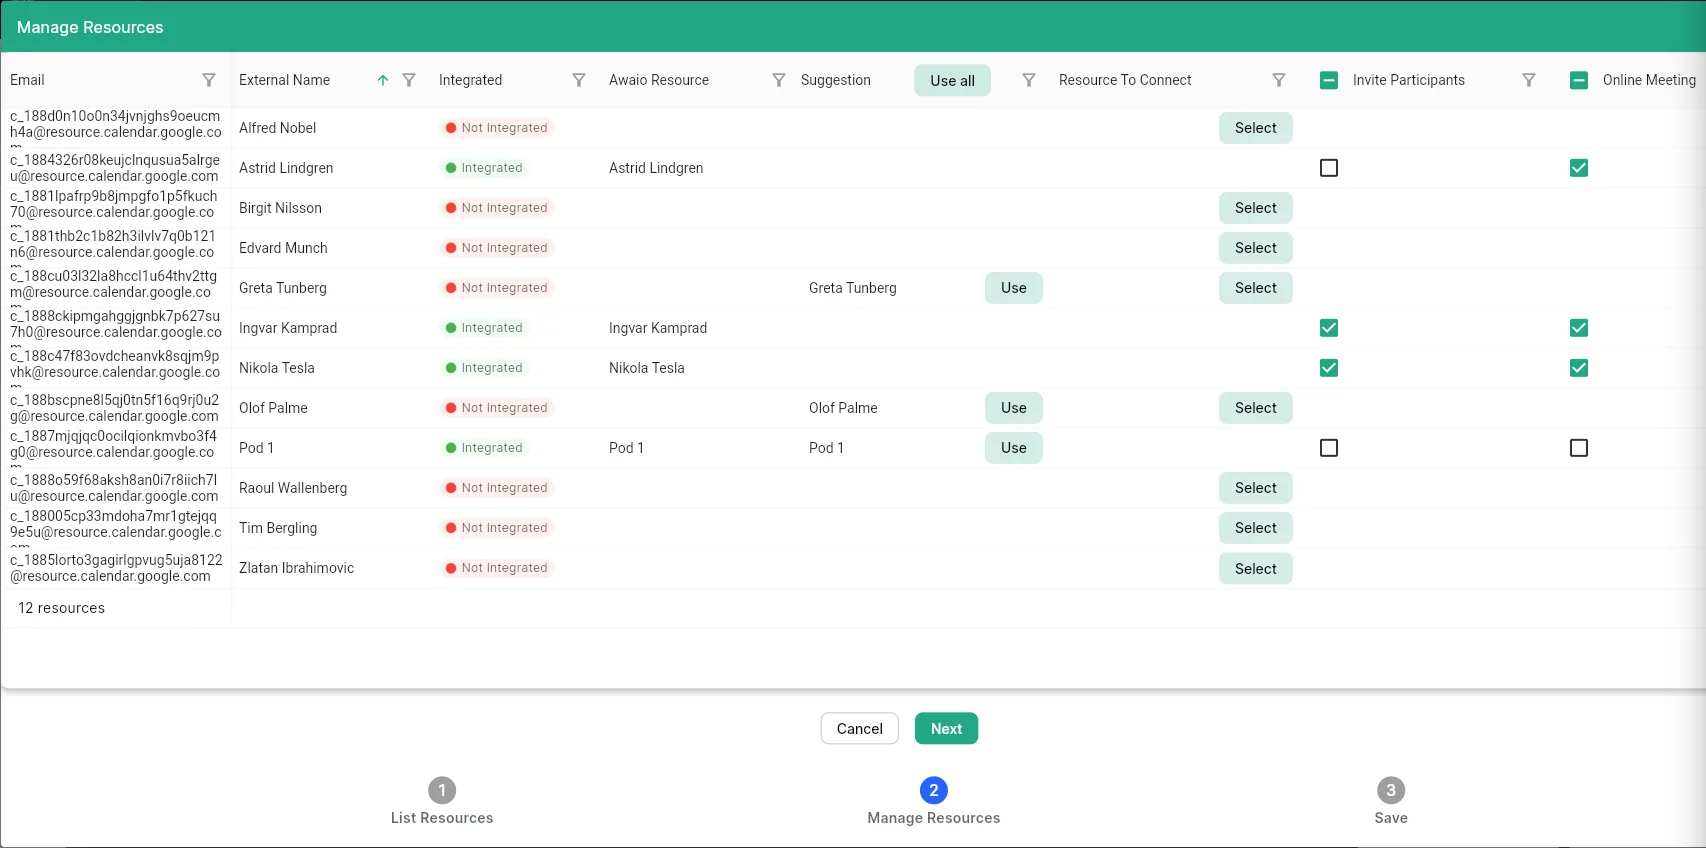
Awaio suggests matches between your Awaio resources and the Google room names. Click Use on each room, or Use all to accept every suggestion. If a suggestion is wrong, use Select to pick the right resource. You can also set Invite Participants and Online Meeting per room here.
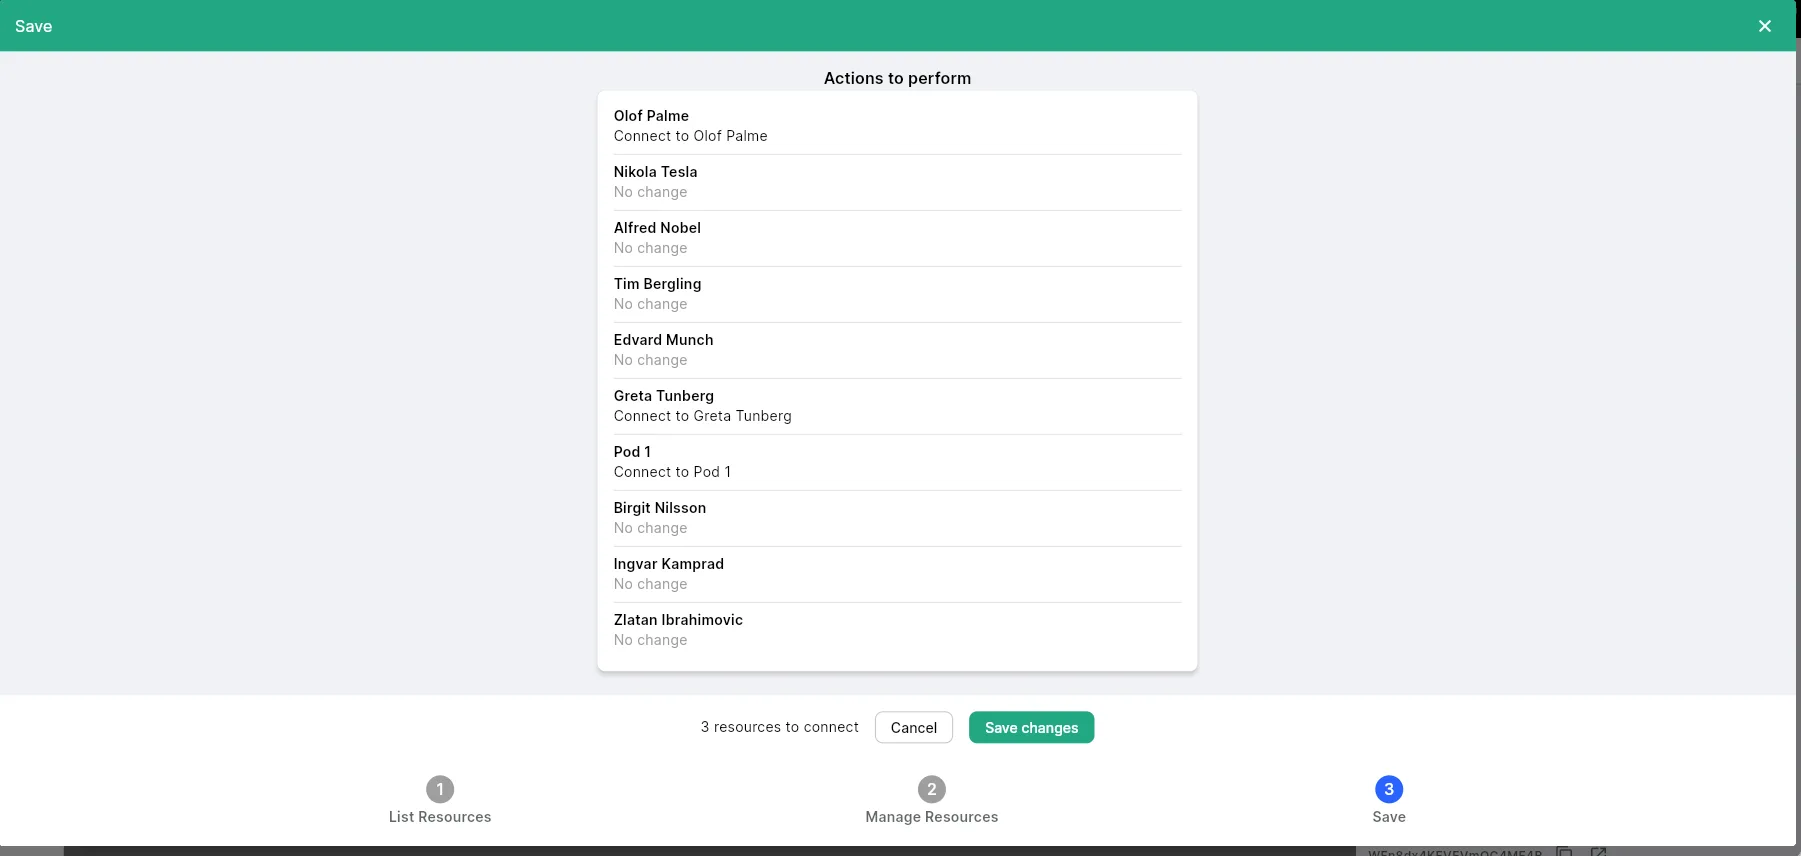
Step 22: Save the changes
Review the list of actions to perform, then click Save changes.
If you have further questions, feel free to contact us via our website chat (awaio.com) or email us at support@awaio.com.
